
How to Darken Leather? From Faded to Fabulous
Reading Time: about
Leather has long been celebrated for its durability and timeless appeal. But beyond its natural beauty lies the potential for transformation—a chance to enhance its depth and character.
Welcome to the intriguing world of leather darkening. In this guide, we'll journey through the art and science of giving leather a richer, more vintage hue.
Whether you're aiming to rejuvenate an old leather bag, add a touch of antiquity to your boots, or simply satiate your curiosity about leather care, we've got insights tailored for you.
Dive in, and discover how to elevate your cherished leather pieces to new aesthetic heights.
Summary
- I. Why Darken Leather Naturally?
- II. Preparations Before Darkening
- III. Natural Methods to Darken Leather
- 1. Using Oils: The Essence of Nature
- 2. Using Coffee: A Brewed Delight for Your Leather
- 3. Using Walnut Hulls: Nature's Dye
- 4. Using Leather Dressing: Nourish and Darken
- 5. Using Natural Polish: Shine and Shade Combined
- IV. Darkening Leather with Dyes
- V. Maintenance and Care
- VI. Frequently Asked Questions

Military Canvas Backpack

Black Canvas Backpack

Waxed Canvas Rucksack

Cotton Canvas Backpack
I. Why Darken Leather Naturally?
Have you ever stumbled upon an old leather journal or a vintage leather bag and been utterly mesmerized by its character? I have, and it's an experience that's hard to put into words.
The deep, rich hues, the stories etched into every crease and fold, the sheer elegance of naturally aged leather – it's a sight to behold. This unique style and appearance are what many of us aspire to achieve when we think of darkening leather. But why go the natural route? Let's delve into that.
1. Unique Style and Appearance
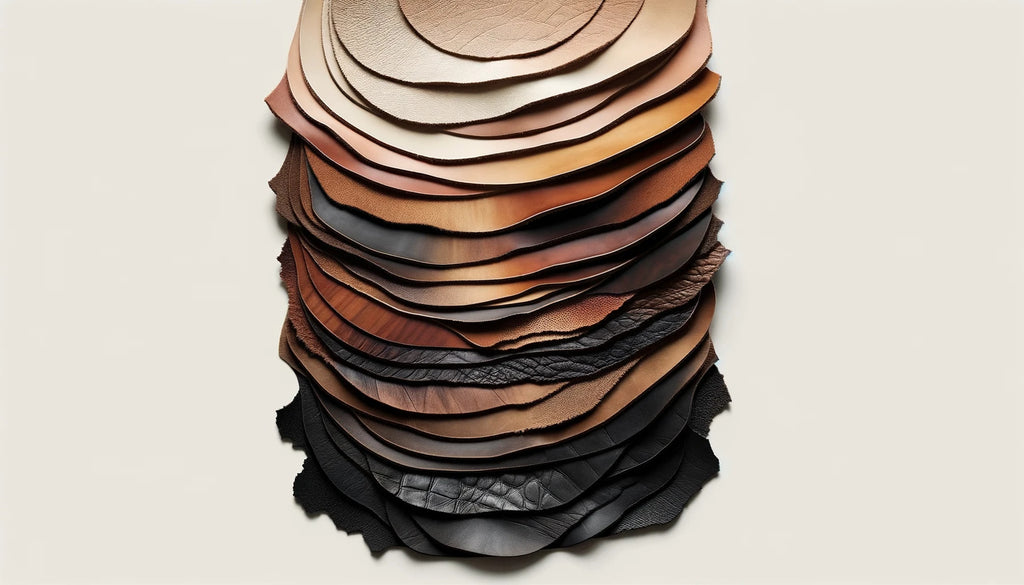
When I talk about the unique style of naturally darkened leather, I'm referring to the authenticity it exudes. Unlike synthetic dyes that often give a uniform, almost factory-made look, natural methods impart a distinctiveness to the leather.
Each piece tells its own story, with variations in shade and texture that are truly one-of-a-kind. It's akin to the difference between a mass-produced print and a hand-painted artwork. The latter, with its subtle imperfections and nuances, has a charm that's unparalleled.
2. Environmental Benefits: Eco-friendly Alternatives to Chemical Dyes
In today's world, where sustainability is not just a buzzword but a necessity, the choices we make matter. And this extends to how we treat our leather. Synthetic dyes, while effective, often contain chemicals that can be harmful to the environment. Their production, usage, and disposal come with a carbon footprint that's hard to ignore.
On the flip side, natural methods, be it using vegetable oils, plant-based concoctions, or even the simple act of sun-tanning, are eco-friendly. They align with the principles of sustainable living, ensuring that our love for leather doesn't come at the planet's expense. It's a win-win, if you ask me!
3. Enhanced Durability and Protection Against Wear and Tear
Now, this might come as a surprise to some, but naturally darkening leather can actually enhance its durability. Think about it. When you're using natural oils or conditioners, you're not just altering the leather's color; you're nourishing it.
These natural agents seep into the leather, making it more supple, resistant to cracks, and better equipped to handle the rigors of daily use. It's like giving your leather a spa treatment, rejuvenating it from within. The result? Leather items that not only look fantastic but also stand the test of time.
While the allure of quick fixes and vibrant synthetic shades might be tempting, there's a profound beauty in going natural. It's a choice that reflects a deep appreciation for authenticity, a commitment to the environment, and a keen understanding of leather's inherent qualities.
II. Preparations Before Darkening
Before we embark on the transformative journey of darkening leather, it's crucial to lay the groundwork. Just as a painter wouldn't start on a dirty canvas, we shouldn't begin the darkening process without ensuring our leather is pristine.
Proper preparation not only ensures an even and desirable result but also prolongs the life of our cherished leather items. Let's delve into the essential steps.
1. Cleaning the Leather:
a. Vacuum or Dust Off Any Debris:
Imagine you're about to enjoy a delicious meal. Would you start without cleaning your plate? Similarly, the first step in our leather preparation is to remove any surface dirt or debris. I recommend using a soft brush or a vacuum with a brush attachment. This gentle approach ensures that you don't inadvertently scratch or damage the leather.
b. Use Mild Dish Soap and Water for a Thorough Cleaning:
Now, this might sound like a kitchen tip, but trust me, it works wonders for leather too. Create a mild solution by mixing a few drops of dish soap in water. Dip a soft cloth into this solution, wring out the excess, and gently clean the leather in circular motions. This step helps in removing any stubborn dirt or stains that might have settled over time.
c. Wipe Down with a Damp Rag to Remove Soap Residues:
After the soapy adventure, it's essential to ensure no soap residues remain. Using another clean, damp cloth, gently wipe down the leather. This step ensures that the leather is free from any residues that might interfere with the darkening process.
2. Drying the Leather:
a. Air Dry Naturally, Avoiding Direct Sunlight:
Leather and direct sunlight are not the best of friends. While sunlight can naturally darken leather (a tip we'll explore later), excessive exposure can cause it to dry out and crack. After cleaning, place your leather item in a well-ventilated area, away from direct sunlight, and let nature do its thing.
b. Ensure Leather is Completely Dry Before Proceeding:
Patience is a virtue, especially when it comes to leather care. Before you jump into the darkening process, ensure the leather is thoroughly dry. Any residual moisture can lead to uneven darkening or, worse, mold growth.
The key to a successful leather darkening process lies in meticulous preparation. It's like setting the stage for a grand performance. With a clean and dry leather canvas, you're all set to achieve that rich, deep hue you've always desired. And remember, as with all things leather, it's not just about the destination but also the journey. So, take your time, enjoy the process, and watch your leather transform before your very eyes.

III. Natural Methods to Darken Leather
Ah, the beauty of going natural! When it comes to darkening leather, Mother Nature has bestowed us with a plethora of options. Each method, with its unique charm, ensures that our beloved leather items not only look good but also retain their natural essence. Let's embark on this enlightening journey together, shall we?
1. Using Oils: The Essence of Nature
Types of Oils: Nature, in its bounty, offers a plethora of oils that can beautifully enhance leather's appearance and texture. Here's a closer look at some of the most revered ones:
-
Neatsfoot Oil: Extracted from the shin bones and feet of cattle, this oil is a favorite among leather enthusiasts for its ability to provide a rich, deep hue.
-
Mink Oil: Derived from the fatty layer under mink skins, it not only darkens leather but also conditions it, making it supple and soft.
-
Coconut Oil: Beyond its culinary uses, coconut oil, with its pleasant aroma, can give leather a subtle, warm tone.
-
Olive Oil: A household staple, olive oil can be a handy agent for leather darkening, offering a gentle, natural sheen.
Step-by-Step Application Process: The true magic unfolds during the application. Here's a detailed breakdown to ensure you get it right:
-
Preparation: Start by cleaning the leather surface to remove any dust or grime. A clean surface ensures better oil absorption.
-
Choosing the Oil: Depending on the desired effect and the type of leather, select an appropriate oil. Remember, each oil has its unique properties and results.
-
Application: Pour a small amount of oil onto a soft cloth. Gently rub the cloth in circular motions over the leather surface, ensuring even distribution.
-
Absorption: Allow the leather to rest and absorb the oil. This might take a few hours. It's crucial not to rush this process, as the oil needs time to penetrate deep into the leather fibers.
Multiple Applications: Achieving the perfect shade might require a bit of patience and repetition. Here's how to go about it:
-
First Coat: Apply the initial coat as described above and let the leather dry completely.
-
Assessment: Once dry, assess the color. If it's not as dark as you'd like, consider a second application.
-
Subsequent Coats: Apply additional coats, ensuring you allow the leather to dry thoroughly between each application. This ensures that each layer is absorbed properly, deepening the hue with every coat.
-
Final Touch: Once you've achieved the desired shade, give your leather item a gentle buff with a clean cloth. This will enhance its shine and ensure an even tone.
Remember, the journey of darkening leather with oils is as much about the process as it is about the result. Enjoy each step, and you'll be rewarded with a leather piece that not only looks exquisite but also tells a story of care and dedication.

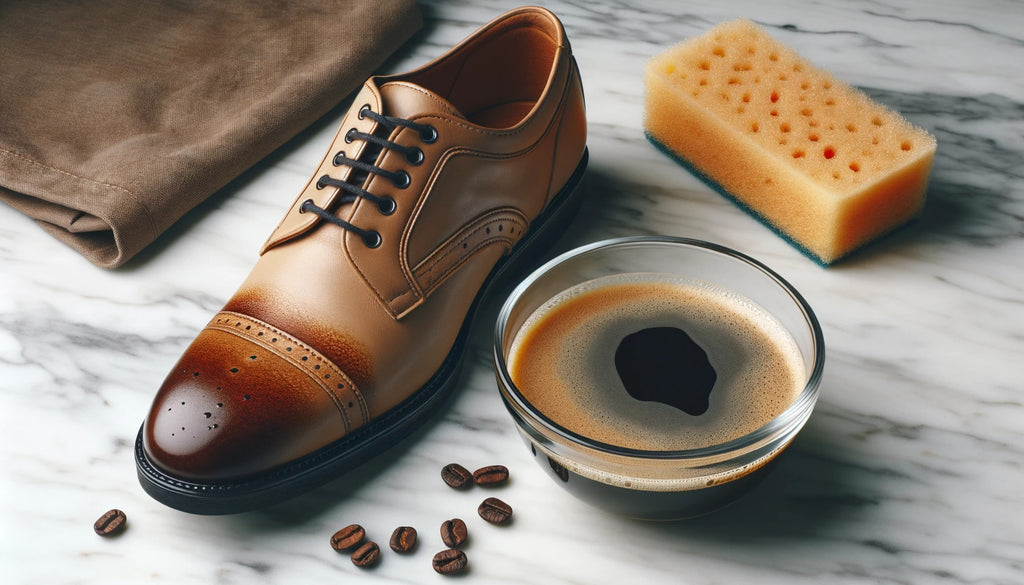
2. Using Coffee: A Brewed Delight for Your Leather
Who knew that the same beverage that kickstarts our mornings could also be the secret to giving leather a rich, vintage charm? Coffee, with its deep hues and natural staining properties, can be a leather enthusiast's delight. Let's delve into the step-by-step process of using this brewed wonder to darken your leather items:
-
Choosing Your Coffee Beans:
- Opt for dark roast beans. They tend to yield a stronger brew, perfect for darkening leather.
-
Brewing the Perfect Cup:
- Aim for a robust brew. The idea is simple: the richer the coffee, the deeper the potential shade on the leather.
- Avoid adding any milk or sugar. We want pure, undiluted coffee for this process.
-
Preparation of the Leather:
- Clean the leather surface to remove any dust or grime. A clean surface ensures even application.
- Dry the leather naturally, ensuring it's free from moisture.
-
Application Process:
- Dip a soft, lint-free cloth into the brewed coffee.
- Gently rub the cloth onto the leather in circular motions, ensuring an even coat.
- Allow the leather to absorb the coffee. As it dries, you'll notice a subtle change in its hue.
-
Repeated Applications:
- Depending on the desired shade, you might need to repeat the process.
- Allow the leather to dry completely between applications to gauge the true color.
- Typically, 2-3 applications yield a noticeable darkening, but this can vary based on the leather type and its original color.
-
Drying and Setting:
- Once you've achieved the desired shade, let the leather dry naturally away from direct sunlight.
- Consider using a leather sealant to lock in the color and provide added protection.
-
Maintenance:
- Clean and condition the leather regularly to maintain its darkened hue and overall health.
With these steps, your leather items will not only sport a beautiful, coffee-infused shade but will also exude a unique character, making them truly one-of-a-kind. So, the next time you brew a cup, remember, it's not just for sipping; it's for styling too!
3. Using Walnut Hulls: Nature's Dye
Walnut hulls, typically overlooked and discarded, are nature's unsung heroes in the realm of leather darkening. These hulls, packed with tannins, can transform your leather items, giving them a rich, deep hue reminiscent of bygone eras. Here's a step-by-step guide to harnessing the power of walnut hulls for leather darkening:
1. Gathering Walnut Hulls:
- Collect mature, ripe walnuts. The hull is the outermost, green layer of the walnut.
- Ensure they are free from mold or excessive decay.
2. Preparing the Hulls:
- Using a knife, carefully separate the hulls from the inner nut.
- Crush or break the hulls into smaller pieces for faster extraction of tannins.
3. Soaking for Extraction:
- Place the crushed hulls in a container.
- Pour enough water to submerge the hulls completely.
- Allow them to soak until the water turns a dark brown shade. This might take a few hours to a couple of days, depending on the quantity and freshness of the hulls.
4. Straining the Solution:
- Once the desired color is achieved, strain the solution to remove any solid hull pieces.
- Store the liquid in a clean container, ensuring it's free from contaminants.
5. Application Process:
- Clean your leather item to remove any dirt or grime.
- Using a clean sponge or brush, evenly apply the walnut hull solution to the leather's surface.
- Allow the leather to absorb the solution. You can apply multiple coats for a deeper shade, ensuring each coat dries before the next application.
6. Drying and Setting:
- Let the leather air dry naturally, away from direct sunlight or heat sources.
- Once dry, buff the leather with a soft cloth to enhance its shine.
7. Sealing (Optional):
- To ensure longevity and protect the darkened shade, consider applying a leather sealant or conditioner.
With patience and care, walnut hulls can offer a natural, eco-friendly alternative to commercial dyes, bestowing upon your leather items a unique and vintage charm.

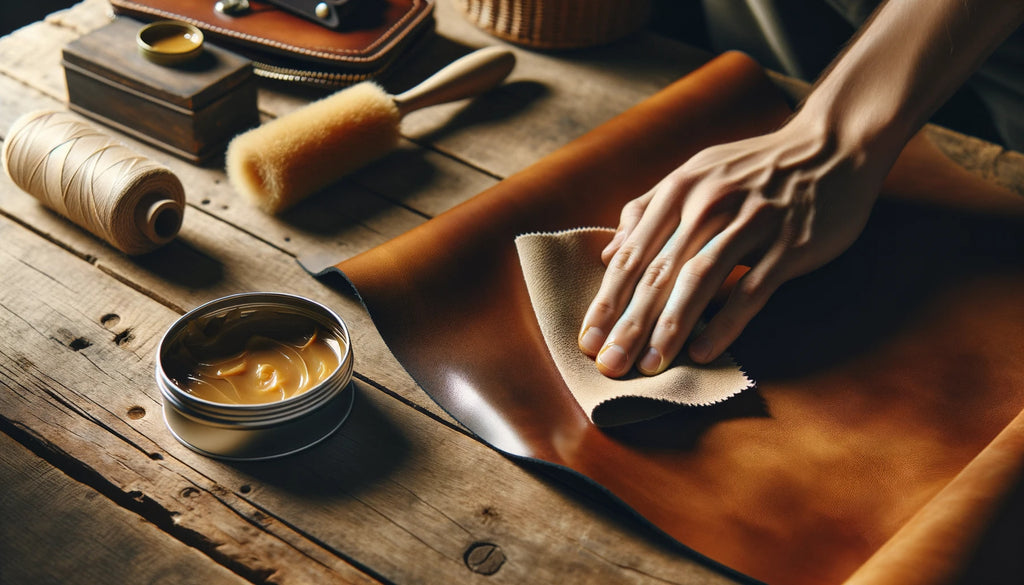
4. Using Leather Dressing: Nourish and Darken
Leather dressing is a time-honored method to both nourish and darken leather items. Think of it as a rejuvenating spa treatment that not only revitalizes the leather but also imparts a richer, deeper hue. However, as with all things leather, there's an art to the application. Here's a step-by-step guide to ensure you get the most out of your leather dressing:
Step-by-Step Application Process:
- Clean the Leather: Before any application, ensure the leather is free from dust and grime. Use a soft brush or cloth to gently clean the surface.
- Test a Small Area: Always apply a small amount of the dressing to an inconspicuous area to check for any adverse reactions or color changes.
- Apply Evenly: Using a soft cloth, apply the leather dressing in circular motions, ensuring an even coat across the entire surface.
- Allow to Absorb: Let the leather soak in the dressing for a few hours, or ideally, overnight.
- Buff to Shine: Once the dressing has been absorbed, buff the leather with a clean cloth to bring out its natural shine.
- Repeat if Necessary: Depending on the desired darkness, you might need to apply additional coats. Always allow the leather to absorb one coat fully before applying another.
Compatibility:
- Research the Product: Not all leather dressings are created equal. Some might be oil-based, while others might be wax-based. Understand the composition before application.
- Check for Leather Type: Whether you have full-grain, top-grain, or bonded leather, ensure the dressing is suitable for your specific type.
- Read Reviews: Before settling on a product, read reviews and perhaps consult with leather experts or enthusiasts to get recommendations.
Remember, while leather dressing can enhance the color and health of your leather items, the key lies in the careful and informed application. With the right product and technique, your leather will not only look better but also last longer, narrating tales of its rich journey.

5. Using Natural Polish: Shine and Shade Combined
Leather, in its essence, is a testament to nature's brilliance. But with a touch of natural polish, its beauty can be further accentuated, combining both shine and shade. Here's a step-by-step guide to mastering the art of using natural polish on leather:
-
Choose the Right Polish:
- Beeswax Polish: Known for its protective properties, beeswax polish not only darkens leather but also shields it from potential damage.
- Mink Oil Polish: A nourishing choice, mink oil polish deeply conditions the leather, giving it a rich hue while maintaining its suppleness.
-
Clean the Leather: Before any application, ensure the leather is clean. Wipe off any dust or debris to ensure the polish adheres well.
-
Application:
- Take a small amount of the chosen polish on a soft cloth.
- Gently apply the polish in small circles, ensuring even coverage across the leather surface.
- Allow the leather to absorb the polish. As it does, you'll notice the leather taking on a deeper, more vibrant shade.
-
Drying Time: Let the leather sit for a few hours, allowing the polish to penetrate deeply and work its magic.
-
Buffing:
- Once the polish is dry, take a soft, clean cloth.
- Buff the leather in gentle, circular motions. This process not only enhances the leather's shine but also ensures an even darkening effect.
-
Maintenance: To maintain the newly acquired shade and shine, consider reapplying the polish every few months or when the leather starts to look dull.
The dance between nature and craftsmanship in darkening leather is truly mesmerizing. With natural polishes, you're not just adding color; you're enriching the leather's story, ensuring it narrates tales of care, love, and nature's touch. Whether you're a seasoned leather aficionado or just starting your journey, remember: with the right methods and a touch of patience, nature indeed has your back!
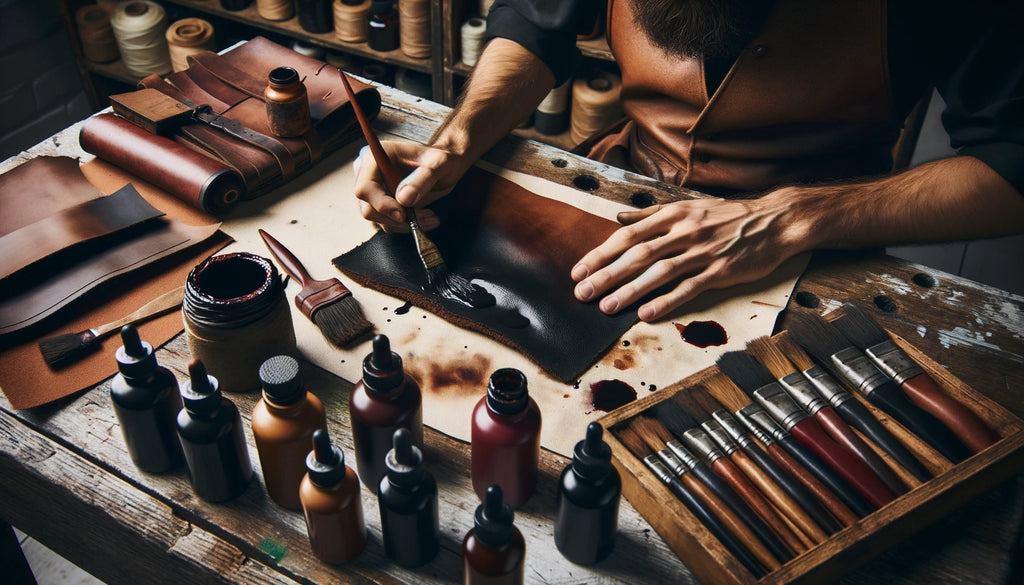
IV. Darkening Leather with Dyes
When I think of dyes, I'm reminded of an artist with a palette, ready to breathe life into a blank canvas. Similarly, dyes offer us the chance to transform our leather items, giving them a fresh, vibrant hue or restoring their lost glory. But, as with any art, the key lies in understanding the medium and choosing the right tools.
1. Types of Dyes: The Great Debate - Oil-based vs. Water-based
When it comes to leather dyes, the debate often boils down to two main contenders: oil-based and water-based dyes. Let's break them down, shall we?
Oil-based dyes: These are the old-school favorites. Rich, long-lasting, and deeply penetrating, oil-based dyes offer a saturated color that's hard to beat. They bond well with the leather, ensuring that the color doesn't easily fade or rub off. However, they come with a caveat. Being solvent-based, they can be a tad harsh on the leather, potentially drying it out. So, if you're going the oil-based route, I'd recommend following up with a good leather conditioner to keep the leather supple.
Water-based dyes: The new kids on the block, water-based dyes are gaining popularity for being eco-friendly and less harsh on the leather. They're essentially pigments suspended in water, making them easier to clean up and less pungent than their oil-based counterparts. However, they might require multiple coats to achieve the same depth of color as oil-based dyes. But on the bright side, they allow for more flexibility, especially if you're looking to mix colors or achieve a more translucent effect.

Vintage Laptop Rucksack

Vintage Canvas Backpack

Retro Canvas Rucksack

Waxed Canvas Backpack
2. Application: The Art of Even Coloring
Now, onto the fun part – application! Whether you're a seasoned pro or a newbie, the key to a flawless finish lies in even application. And for that, my go-to tools are a good sponge or a soft cloth. Brushes? They're great, but they can sometimes leave streaks, especially if you're not careful.
Start by prepping your leather – clean it, and ensure it's free from dust or grease. Then, dip your sponge or cloth into the dye, wringing out any excess. Begin applying in gentle, circular motions, ensuring that you cover every nook and cranny. The idea is to build the color gradually, layer by layer, rather than slathering on a thick coat.
3. Achieving the Desired Darkness: Patience is Key
One coat might not cut it, especially if you're aiming for a deep, rich hue. But here's where patience comes into play. Allow each coat to dry thoroughly before applying the next. This not only ensures better adhesion but also gives you a clearer picture of the final shade. Remember, it's easier to add more dye than to take it away!
In my journey with leather, I've learned that darkening with dyes is as much an art as it is a science. It's about experimenting, learning from mistakes, and, most importantly, enjoying the process. So, as you embark on this colorful adventure, take a moment to appreciate the transformation, the nuances, and the sheer joy of creating something uniquely yours. And who knows? You might just discover a hidden artist within you!
V. Maintenance and Care
The journey with leather doesn't end once we've achieved that perfect shade. In fact, it's just the beginning. Leather, much like a living entity, requires care, love, and attention. And if you're anything like me, you'd want your leather items to not just look good, but also stand the test of time. So, let's delve into the essential steps to ensure your darkened leather remains in pristine condition.
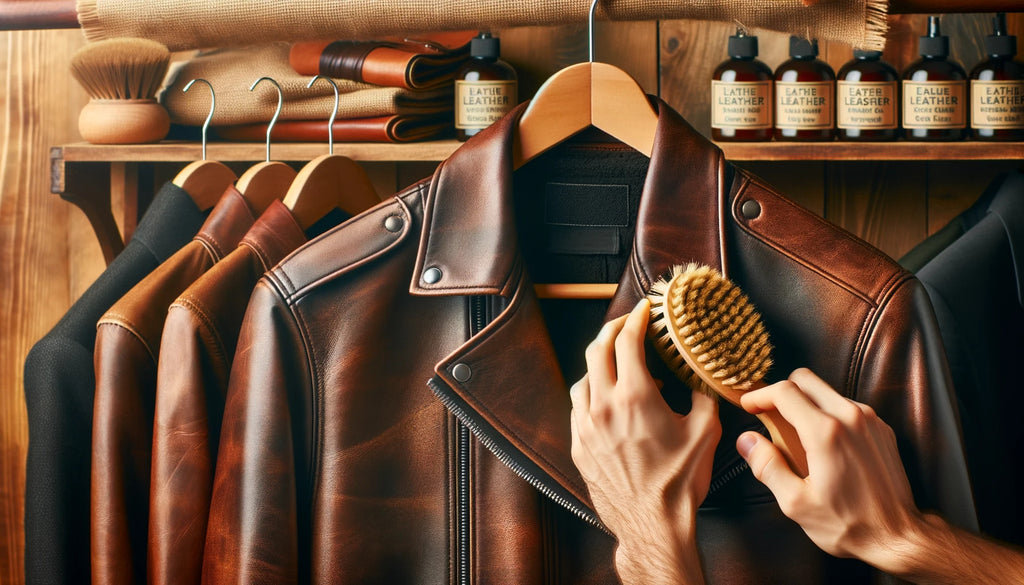
1. Regular Cleaning to Prevent Dirt Buildup
Every time I step out with my leather boots or sling on my leather bag, they're exposed to the elements. Dust, grime, and even the occasional coffee spill (yes, I'm a bit clumsy) can mar its appearance. Regular cleaning is, therefore, not just recommended—it's essential.
Start with a soft brush to dust off the surface. This simple act can keep the leather looking fresh and prevent dirt from settling into the crevices. For those stubborn stains or accumulated grime, a damp cloth with a mild leather cleaner works wonders. Remember, the key is to be gentle. Vigorous rubbing can strip the leather of its natural oils, making it dry and brittle.
2. Conditioning to Maintain the Darkened Color and Leather Health
Now, this is a step I swear by. Conditioning leather is like giving it a spa treatment. Over time, especially after darkening, leather can lose some of its moisture. A good conditioner replenishes these essential oils, ensuring the leather remains supple and vibrant.
But here's a pro tip: Always choose a conditioner that's compatible with your leather type and the darkening method you've used. Apply it in small amounts, using circular motions, and let the leather soak in the goodness. Not only will this maintain the darkened hue, but it'll also enhance the leather's overall health.
3. Protection Against Direct Sunlight and Harsh Chemicals
Imagine lounging in the sun for hours without sunscreen. Ouch, right? Leather feels the same way. Prolonged exposure to direct sunlight can cause it to fade, and in some cases, even crack. Always store your leather items in a cool, dry place away from direct sunlight.
Similarly, harsh chemicals are a big no-no. Whether it's a cleaning agent or a spill from a pen, chemicals can cause discoloration and damage the leather's texture. Always keep your leather items away from potential chemical hazards. And if there's an accidental spill, address it immediately with a gentle cleaner.
Maintaining and caring for darkened leather is a labor of love. But trust me, the results are worth it. With regular cleaning, conditioning, and protection, your leather items will not only look stunning but will also narrate tales of adventures for years to come. So, here's to many more leather-filled journeys together!
Conclusion
Our journey through the world of leather darkening has been enlightening, to say the least. From understanding the reasons behind darkening leather to diving deep into the methods and ensuring its care, we've covered a lot of ground. Leather, with its rich history and timeless appeal, is more than just a material. It's a testament to style, durability, and craftsmanship.
By darkening it, we not only enhance its beauty but also add a personal touch, making it truly our own. But remember, like any cherished possession, it demands care and attention. With the right maintenance and a dash of love, your darkened leather items will remain a cherished companion for years to come.
So, whether you're a seasoned leather enthusiast or someone just starting out, I hope this guide has equipped you with the knowledge and confidence to embark on your leather darkening adventure. Happy darkening!

Canvas Leather Backpack

Canvas Hiking Backpack

Waxed Canvas Backpack

Canvas Drawstring Backpack
Frequently Asked Questions (FAQs)
Why would I want to darken my leather items?
Darkening can enhance the aesthetic appeal, offer added protection, and give leather items a unique, vintage look.
Are natural darkening methods better than synthetic dyes?
While both have their merits, natural methods tend to be gentler on the leather and environmentally friendly.
How often should I clean my darkened leather?
Regular dusting is recommended, with a thorough cleaning every few months or when noticeably dirty.
Can all leather types be darkened?
Most leathers can be darkened, but results may vary based on the type and grade of the leather.
Will darkening affect the leather's texture or feel?
If done correctly, darkening should enhance the leather's appearance without compromising its texture.
How can I protect my leather items from fading?
Store them away from direct sunlight, and consider using protective sprays or conditioners that offer UV protection.
I've over-darkened my leather. Can I reverse it?
While some methods are reversible, others, especially dyes, are permanent. It's always best to test a small area first.
How often should I condition my darkened leather?
Conditioning every 3-6 months is recommended, but this can vary based on usage and environmental factors.
Can synthetic leather be darkened?
Synthetic leather reacts differently, and traditional darkening methods may not be effective or could damage the material.
Is there a risk of the darkening agent rubbing off on clothing?
If the leather is not properly sealed or if excess darkening agent is used, there's a possibility of transfer. Always ensure the leather is dry and sealed before use.
📫 Related Blog Posts:
📌 How to Rehydrate Leather? Leather Rehydration Made Easy
📌 How to Get Water Stains Out of Leather? Erase Water Marks Effortlessly
📌 Best Leather Anniversary Gifts: Celebrate Love with Timeless Elegance
📌 What is Exotic Leather? From Wilderness to Wardrobe
📌 How to Style Leather Pants? A Guide From Rockstar to Runway
📌 How to Clean White Leather? The Ultimate Guide to Pristine Elegance


Leave a comment