The Ultimate Guide to Attaching a Sleeping Bag to Your Backpack
Reading Time: about
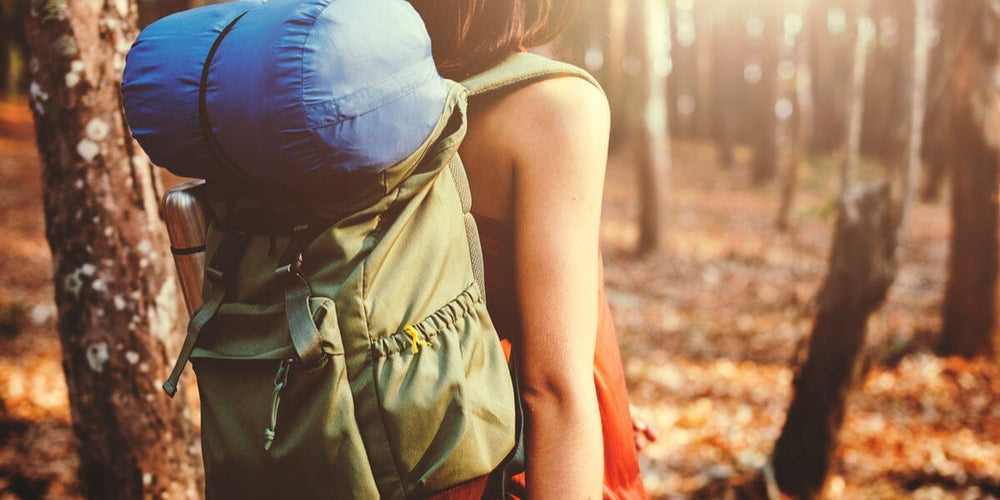
Halfway through your first serious hike, your sleeping bag starts swinging off the bottom of your pack like a pendulum. Your balance shifts, your back aches, and you're already dreading tomorrow's climb. Sound familiar?
To attach a sleeping bag to a backpack, use compression straps at the bottom of the pack (most secure), bungee cords or carabiners on external loops, or a dedicated sleeping bag compartment if your pack has one. Always compress the bag first — an uncompressed sleeping bag adds bulk that throws off your center of gravity.
We cover five attachment methods ranked by security, plus the positioning mistakes that cause 90% of the discomfort.
Summary
- 1. Preparing Your Backpack and Sleeping Bag for Attachment
- 2. Methods for Attaching a Sleeping Bag to Your Backpack
- 3. Where to Attach Your Sleeping Bag: Strategic Positioning?
- 4. What NOT to Do When Attaching Your Sleeping Bag
- 5. Essential Safety Tips and Precautions
- 6. Frequently Asked Questions (FAQs)
How Do You Prepare Your Pack and Sleeping Bag?
So you've got your backpack, you've got your sleeping bag, and now you're wondering how to put the two together, right? Don't fret; we've got you covered. Getting your gear in sync is like a relationship: it takes a little time and understanding. So let's dive in.
1. Assessing Your Backpack’s Compatibility
First thing's first, let's talk about your backpack. Not all backpacks are created equal, especially when it comes to hauling a sleeping bag around. Yep, some are more like picky eaters, only wanting certain types of gear.
Types of backpacks suitable for sleeping bag attachment
There are generally three types of backpacks that are best buds with sleeping bags:
- Hiking Backpacks: These usually come with built-in loops and straps specifically designed to hold extra gear. Perfect match? I'd say so!
- Travel Backpacks: If you’re a globetrotter, chances are your travel pack might not have specialized loops, but they usually have enough space and additional compartments.
- Hybrid Backpacks: These are the chameleons of the backpack world, switching between hiking and urban life. They’re generally more versatile but might require some extra attachments like carabiners or bungee cords.
Points of attachment: loops, straps, and external frames
Loops and straps are like the velcro in a relationship—they keep things together. Some packs come with built-in loops at the bottom or straps on the sides. If you’re lucky, you might even find one with an external frame that offers multiple attachment points. Think of it as the Swiss Army knife of backpacks!
Remember that time you tried to shove a square peg into a round hole as a kid? Didn't work, did it? The same logic applies here. Make sure your attachment points and sleeping bag are compatible. Nothing is worse than realizing mid-hike that your gear is slipping off.
2. Preparing Your Sleeping Bag for Attachment
Now that your backpack is sorted, let's switch gears and talk about your cozy cocoon—aka your sleeping bag.
Compression sacks for minimizing size
Ever tried fitting into your high-school jeans? Compression sacks are like that, but for your sleeping bag. They squeeze your sleeping bag into a more manageable size. Trust me; it's way easier to attach a compact bag than wrestling with a big, bulky one. I've been there, and it's a sweaty struggle.
Folding vs. Rolling: Which is more efficient?
Ah, the age-old debate: to fold or to roll? Honestly, it’s like choosing between cake and ice cream; both are great but serve different purposes.
-
Folding: Easier for square or rectangular sleeping bags. Fold it into a size that matches your backpack’s width. This makes it easier to secure and keeps it from becoming a swinging pendulum of doom.
-
Rolling: Best for mummy-shaped bags. Roll it tight and secure with the built-in straps or additional paracord. This minimizes the profile and makes it easier to attach to the bottom or sides of your backpack.
Quick pro tip: If you roll, start from the foot end to squeeze out any trapped air. Trust me, you'll thank me later when your bag is snug as a bug in a rug!
📷 Credit: Snowys Outdoors's Youtube Channel
Impact on Thermal and Technical Capacities: Folding vs. Rolling
Now that you know the logistical benefits of folding versus rolling your sleeping bag, let's dive into how these methods can affect its thermal and technical capacities. This part is crucial; after all, we're not just carrying these bags for fun—they have a job to do, keeping us warm and cozy in the great outdoors!
Folding: The Good and the Not-so-Good
When you fold your sleeping bag, especially those square or rectangular types, you're generally not compressing the insulation as much as when you roll it. Less compression means the insulation can maintain its loft better, which is a fancy way of saying it will keep you warmer. However, folding can create creases in the material and potentially cause cold spots over time. If you frequently fold your sleeping bag the same way, these creases could become more pronounced, affecting the bag's ability to hold heat evenly.
Rolling: The Pros and the Cons
Rolling your sleeping bag, particularly mummy-shaped ones, often leads to more compression, especially if you're using straps or paracord to get it as tight as possible. While this is excellent for saving space and creating a streamlined profile on your backpack, it can slightly reduce the insulation's loft. If you're going to be in colder environments, this is something to consider. On the flip side, rolling generally doesn't produce the same kind of creases and cold spots that folding can, offering a more consistent thermal experience.
Quick Pro Tip: If you roll your bag, try to use it or at least unroll it when you can, letting the insulation loft back up. And if you're storing your bag for a while, it's better to leave it in a loose, uncompressed state to maintain its thermal capacities for your next adventure.
By considering the best types of backpacks for sleeping bag attachment, appropriate connection points, and optimal sleeping bag packing methods, you're well on your way to becoming an outdoor pro. Next up, let's talk about the art of the actual attachment. Trust me, it's easier than assembling IKEA furniture—I promise!
📷 Credit: Pack Hacker's Youtube Channel
What Are the Best Methods to Attach a Sleeping Bag?
Alright, folks, gather 'round! You've got your backpack prepped and your sleeping bag squished down to a portable pancake. Now it's time for the real action: getting that sleeping bag attached to your backpack. It's like a cliffhanger in a movie, but don't worry, I've got your back!
1. Utilizing Built-in Straps
If your backpack came with built-in straps designed for this very purpose, you're in luck! It's like finding an extra fry at the bottom of the bag—always a win.
Step-by-step guide to using bottom loops and top straps
-
Lay It Out: First, lay your backpack flat on the ground, front side down. Make sure all the straps are unbuckled and untangled.
-
Position Your Sleeping Bag: Place your compressed or rolled-up sleeping bag across the loops at the bottom of the backpack. Some people say it's like swaddling a baby, but I wouldn't know anything about that.
-
Thread Through: Now, take those bottom straps and thread them through the loops on your sleeping bag or its compression sack. Don't rush through this; patience is key—think threading a needle but way easier.
-
Buckle Up: After threading, buckle the straps securely. Do a little tug-of-war to make sure it's snug but not too tight—you don't want to strangle your sleeping bag.
📷 Credit: NEMO Equipment's Youtube Channel
How to adjust straps for a secure fit
Give those straps a good yank to ensure they're tight, but not strangling your sleeping bag. If your bag starts to look like a vacuum-sealed vegetable, you've gone too far. Most straps have sliding adjusters; use these to fine-tune the fit.
You want it snug but not suffocating. Kinda like a well-fitting pair of jeans—holds everything in place without cutting off circulation.
2. Using Additional Gear
Sometimes you need a little extra somethin'-somethin' to make it all come together. Maybe your backpack didn’t come with straps, or perhaps you're looking to attach more than just a sleeping bag.
Carabiners
Ah, the carabiner: the duct tape of the outdoor world. These little bad boys can help secure your sleeping bag with a quick clip. Just loop 'em through your backpack's frame or available straps and clip your bag in place.
Paracord
Think of paracord as the Swiss Army knife in string form. Loop it through your bag, make a couple of sturdy knots, and voila! Just be sure you know how to untie those knots; otherwise, you'll be reaching for your multi-tool's knife at the end of the day.
Bungee Cords
They're like trampolines for your gear. Bungee cords are excellent for quick attachments but remember—they're stretchy. If you don't secure them well, your sleeping bag might just bounce off mid-hike. Now, that would be a spectacle, wouldn't it?
📷 Credit: FIRST CLASS AMATEUR's Youtube Channel
3. Pros and Cons of Different Attachment Methods
You've got options, but like choosing between Netflix shows, each has its pros and cons.
Security vs. Accessibility
Built-in straps are usually the most secure, but if you've got to access your bag often, they can be a pain. Carabiners offer more accessibility but might not be as secure for rough trails. It’s like the difference between a padlock and a snap clip; one's secure but fussy, the other's quick but maybe not so reliable.
Weight distribution considerations
Balance is key, people! If your sleeping bag hangs too low, it might drag you down like an anchor. Too high, and you'll feel like you're about to tip over. Always strive for that sweet spot in the middle. Imagine it like holding a tray of drinks; balance is key unless you want to wear your mojito.
By now, you should be a sleeping bag attachment guru. Whether you’re a strap lover, a carabiner fan, or a bungee enthusiast, you’ve got the know-how to secure your bag like a pro. Next on our guide, let’s discuss the all-important question—where exactly should you position that sleeping bag? Stay tuned!
Where Should You Attach a Sleeping Bag on Your Pack?
So, you're all set to head out into the wild blue yonder with your backpack and sleeping bag securely fastened. But wait a second—where should that sleeping bag actually go? Believe it or not, positioning matters. It's like placing your speakers in a home theater setup: put them in the right spot, and you're golden; put them in the wrong place, and you're in for an acoustic disaster. Let's break it down.
1. Inside the Backpack
Hold up, I hear you asking, "Why not just put the sleeping bag inside the backpack?" Great question! Placing your sleeping bag inside the main compartment of your backpack is a totally viable option, especially if you have a larger capacity bag designed for extended trips. It's also a good strategy if you're facing rainy or wet conditions, as it's easier to keep your sleeping bag dry when it's tucked inside.
However, keep in mind that sleeping bags can be bulky, even when compressed. Storing it inside will take up valuable real estate in your backpack that you might need for food, clothing, or other essentials. It can also make your pack quite heavy in the middle, which some people find uncomfortable. But hey, if you've got the space and prefer this method, go for it!
2. The Bottom of the Backpack
It might seem like a no-brainer to sling your sleeping bag under your backpack. But let's delve into the nuts and bolts to see if it's actually the best choice for you.
When and why to attach at the bottom
Bottom placement is like the classic vanilla ice cream of sleeping bag strategies—it’s generally a good choice that works well for most people. It's especially effective for hiking on well-trodden paths or during relatively short trips.
By placing the sleeping bag here, you’re freeing up internal space for other essentials like food, water, and that secret stash of chocolate bars (come on, we all have one). Plus, it keeps the items you’ll need less frequently out of the way until it’s time to set up camp.
Impact on center of gravity
Ever tried walking with weights tied to your ankles? Me neither, but I can imagine it's tough. Attaching a sleeping bag to the bottom can affect your center of gravity. For lighter sleeping bags, this won’t be an issue. But if you’re carting around a heavy-duty, 4-season sleeping bag, you might start to feel like a seesaw. Aim for a balance by adjusting the straps to keep the bag snug against the bottom, reducing sag and swing.
📷 Credit: The Survival Workshop's Youtube Channel
3. The Sides or Front of the Backpack
Not all hikes are the same—sometimes you're scrambling up rocks, other times you're navigating through dense forest. So why should your sleeping bag always be at the bottom? Exactly, it shouldn't.
Situations where this is advisable
When you're hiking on uneven terrain or need frequent access to your sleeping bag (hey, maybe you like naps), placing it on the sides might be your best bet. This can also be advantageous in winter conditions when the ground might be wet or frozen.
Maybe you're carrying other gear on the bottom, like a tent or cooking equipment. Or perhaps you’re doing a multi-day trek and need to access your sleeping bag frequently for, let's say, an impromptu picnic or a quick rest. Side or front attachment would be your go-to here.
Tips for maintaining balance
Balance is not just something you strive for in life; you need it on the trail, too. If you’re going to put your sleeping bag on the side, make sure to balance out the weight on the other side. Think of it as a pair of scales; you want them as even as possible.
If attaching to the front, aim for a position that doesn't obstruct your view or arm movements. The last thing you want is to be wrestling with your gear mid-hike.
Congratulations, you've just aced the crash course in sleeping bag attachment 101. By considering the type of hike you're undertaking and your specific needs, you can choose the best place to attach that trusty sleeping bag of yours. Next, we'll delve into some common pitfalls and how to avoid them. It's a jungle out there, but we're all in this together. Stay tuned!
What Mistakes Should You Avoid When Attaching a Sleeping Bag?
You've got your sleeping bag snuggled into place, you've calculated the optimum center of gravity, and you're feeling like a seasoned pro. But hold your horses, partner! Even the best of us can fall into some classic traps when it comes to attaching gear. Let's talk about some of those "don't-even-think-about-it" moves so you can hike like a boss, not a beginner.
1. Common Mistakes and Their Consequences
While there are plenty of ways to go right, there are also some epic fails waiting for those who don't pay attention. Here's what to avoid.
Over-tightening straps
Imagine wearing a necktie so tight that it cuts off your circulation. Yeah, it's kinda like that with your sleeping bag if you over-tighten the straps. The result? You could damage the bag, the straps, or both. Plus, you might find that removing the bag becomes a Herculean task. Trust me, after a day of hiking, you don't want to wrestle with your gear.
Poorly distributed weight
Remember that feeling when you put too many groceries on one side of the bag? Well, poorly distributed weight can throw you off balance and cause back pain faster than you can say "chiropractor." Not to mention the possibility of tipping over if you’re climbing up or descending a steep hill.
Ignoring balance and center of gravity
Speaking of balance, it's not just a Zen concept; it's essential for hiking. If your sleeping bag is hanging too low or skewed to one side, you'll mess up your center of gravity. Result? You're more likely to trip, fall, or at the very least, endure a seriously uncomfortable hike.
2. How to Avoid These Mistakes
Life is all about learning, right? Well, here's your mini masterclass in avoiding sleeping bag attachment blunders.
Regular checks
As the saying goes, "An ounce of prevention is worth a pound of cure." Periodically stop to inspect your sleeping bag and its attachment points. A quick look can reveal if straps have loosened or if your bag has shifted, helping you correct the issue before it becomes a problem.
Utilizing the right gear for the job
If your backpack doesn't have built-in straps for gear attachment, invest in some quality aftermarket ones or use sturdy carabiners or paracord. This isn't the place to skimp or improvise with subpar materials. Get the right tools for the job, and you'll save yourself a heap of trouble down the line.
The goal is to make your outdoor adventure as epic as possible, and knowing these tips can save you from learning the hard way. Up next, let's focus on some safety tips to ensure that you and your gear make it back in one piece. Stay tuned!
📷 Credit: Exploring Parks - David & Meg's Youtube Channel
What Safety Tips Should You Follow?
You're an adventurer, a trailblazer, a wanderer. But even pioneers like Lewis and Clark took precautions to make sure they returned home with all their gear—and limbs—intact. Safety should always be a priority when you're out embracing the wild. Let's cover some essential safety tips to make sure your sleeping bag stays where it should and doesn't cause you any unnecessary trouble.
1. Securing Your Gear: The Checklist
Safety isn't a one-time act; it's a continuous process. Here's your essential checklist for securing your gear from the moment you hit the trail to the second you make it back.
Pre-trip checks
Before you take even a single step, make sure your sleeping bag is securely attached to your backpack. Check that all straps are well-tightened but not too tight. You don't want to stress the material unnecessarily. Double-check those knots if you're using additional gear like carabiners or paracord. This is like the pre-flight check for pilots—mandatory and non-negotiable.
Mid-trip adjustments
Once you're on the move, it's easy to forget about the gear on your back. But remember, straps can loosen and gear can shift. Plan a few mid-trip stops for quick adjustments. It's like a pit stop in a car race; these little breaks can save you from a world of pain later on.
Emergency fixes for a loose sleeping bag
Sometimes despite your best efforts, things go awry. Maybe a strap breaks or you notice your sleeping bag is starting to sag ominously. Having a small repair kit on hand with zip ties, some duct tape, or even a needle and thread can make all the difference. McGyver your way out of a sticky situation with these quick fixes.
2. Safety Implications of a Poorly Attached Sleeping Bag
You might think that a dangling sleeping bag is a minor inconvenience, but the reality is that it can put you at some significant risks.
Risks involved: Tripping, imbalances, and bag loss
Imagine you're walking a tightrope. Now imagine doing it with a weight swinging wildly from side to side. That's the kind of imbalance a poorly attached sleeping bag can create. It could cause you to trip, twist an ankle, or worse. If you're hiking in risky terrains like cliffs or alongside rivers, the consequences could be severe. And let's not forget the horror of losing your sleeping bag altogether. I don't know about you, but I'm not keen on cuddling with a boulder for warmth.
Safety gear that can help: Mini-locks, zip ties
If you're concerned about your sleeping bag slipping away or getting stolen, consider adding some mini-locks to secure the zippers. Zip ties are another excellent way to add an extra layer of security. They're light, effective, and can quickly be cut away when you need to access your sleeping bag.
Even if you think you've got this down, a quick review never hurts. Safety is not just a buzzword; it's a lifeline when you're far from civilization. Keep these tips in mind, and your next outing will be all about the thrill of the adventure, not the dread of what could go wrong.

Conclusion
And there you have it—the A-to-Z guide on attaching your sleeping bag to your backpack like a pro! We've covered everything from the methods of attachment to common pitfalls and safety precautions.
Remember, knowledge is power, but the right kind of knowledge can also make your hiking or camping trip a lot more enjoyable and safe. Now that you've got all the deets, it's time to go out there and conquer the trails, fields, mountains, or whatever your adventure-loving heart desires.
Stay safe, be smart, and as always, happy hiking!
Frequently Asked Questions (FAQs)
Can I attach a sleeping bag to any backpack?
Not all backpacks are designed to hold a sleeping bag securely. Generally, specialized hiking or camping backpacks come with dedicated loops, straps, or compartments for this purpose. For casual or daypacks, you might need to improvise with additional gear like carabiners or bungee cords.
What can I use if my backpack doesn't have built-in sleeping bag straps?
If your backpack lacks built-in straps specifically for a sleeping bag, you can make use of alternative gear like carabiners, which can hook onto loops or zippers. Paracord and bungee cords can also be useful for creating a secure attachment point.
How tight should the straps be when attaching my sleeping bag?
Straps should be tightened just enough to hold the sleeping bag firmly in place, but not so much that they deform the bag or put undue stress on the straps. Over-tightening can lead to wear and tear on both the sleeping bag and the backpack over time.
How often should I check the attachment?
Checking the attachment should be a regular part of your routine, especially if you're traversing challenging or varied terrain. It's good practice to make quick adjustments during short breaks or whenever you're hydrating.
What should I include in a repair kit for emergency fixes?
A well-rounded repair kit should include duct tape for quick fixes, zip ties for additional security, a set of mini-locks for zipper issues, and a needle and thread for fabric tears. Some people also include small carabiners or additional paracord for improvised fixes.
Is it safe to attach a sleeping bag to the side of my backpack?
Attaching it to the side is possible, but it's usually best to attach it to the bottom for optimal weight distribution and balance. If you do attach it to the side, make sure to balance the weight evenly on both sides to avoid imbalance.
Can I attach multiple items to my backpack along with a sleeping bag?
Yes, you can attach additional items like a tent or a ground mat, but you'll need to be cautious about the total weight you're carrying and how it's distributed. An uneven weight distribution can lead to imbalance and discomfort during your hike.
What are the risks of a poorly attached sleeping bag?
A poorly attached sleeping bag can swing and cause imbalance, increasing your risk of tripping or falling. On steep or precarious terrain, this could lead to serious injuries. Additionally, there's the risk of the sleeping bag detaching and getting lost.
Are there any specific safety gear to secure my sleeping bag further?
For added security, consider using mini padlocks that can lock your sleeping bag's zippers, or employ zip ties for an extra layer of fastening. Both can provide added peace of mind during your journey.
How can I make sure my sleeping bag stays dry when attached to my backpack?
To protect your sleeping bag from moisture, use a waterproof compression sack for packing the sleeping bag initially. Some backpacks come with a built-in rain cover, but if yours doesn't, consider buying one to cover your entire pack when it rains.
📫 Related Blog Posts:
📌 How to Wash a Backpack? Easy Steps for Every Material
📌 Best Urban Backpacks - Ultimate Guide for the Perfect City Backpack
📌 Best Travel Backpacks: How to Perfectly Choose Yours? [Complete Guide]
📌 What is a Satchel? Your Ultimate Guide to This Timeless Accessory
📌 How to Pack a Backpack? A Trailblazer's Guide
📌 Backpack Straps 101: How to Loosen or Tighten for Maximum Comfort
📌 Travel Light, Travel Right: The Ultimate 2-Week Packing Guide
📌 Zipper Troubles? Learn How to Fix a Zipper on a Backpack
📌 From Chaos to Order: Your Ultimate Guide on How to Store Backpacks
📌 From Sore to Soar: Measure Your Torso for the Ultimate Backpack Fit

Leave a comment