How to Dye Leather? A Beginner's Journey into Leather Dyeing
Reading Time: about
Changing the color of leather is one of the most transformative things you can do to an old bag, pair of shoes, or furniture piece. But the wrong approach can leave you with streaky, patchy results. Here's how to do it right the first time.
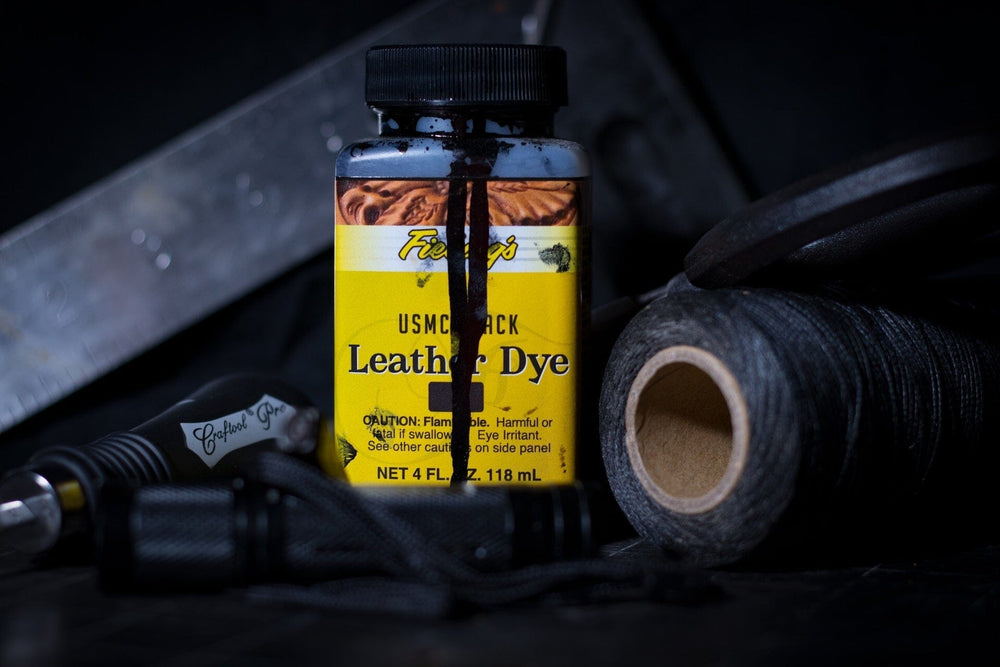
Leather dyeing involves applying alcohol-based, water-based, or oil-based colorants to change or enhance leather's color. Alcohol-based dyes (like Fiebing's Pro Dye) penetrate deepest and produce the most vibrant, permanent results — but the surface must be prepped and deglazed first.
We walk through the complete process from prep to finish, compare dye types, and share the tips that make the difference between amateur and professional-looking results.
Summary
- 1. Understanding Leather
- 2. An Overview of Leather Dyeing
- 3. Tools and Materials Needed
- 4. Safety Measures for Leather Dyeing
- 5. Preparing Your Leather for Dyeing
- 6. Applying the Dye to the Leather
- 7. Finishing Touches: Sealing the Leather
- 8. Exploring Other Leather Dyeing Techniques
- 9. Advanced Dyeing Techniques and Tips
- 10. Do’s and Don’ts of Leather Dyeing
- 11. Frequently Asked Questions
What Types of Leather Can You Dye?
As someone who's spent a good portion of their life working with and learning about leather, I can attest that understanding the ins and outs of this versatile material is the first crucial step before you dive into the wonderful world of leather dyeing.
A. The Basics of Leather
I'm sure you've wondered at least once in your life, "What exactly is leather?" Well, leather is a natural product created through the tanning of animal hide. Primarily, it's derived from cattle hide, but it can also come from pigs, goats, sheep, and more exotic animals like alligators and snakes.
The quality of leather depends largely on the processing and finishing steps. Every piece of leather comes with unique characteristics like wrinkles, scars, and variations in color and grain. It's these distinct features that make each leather product one-of-a-kind.
B. Different Types of Leather
Not all leathers are created equal. There are four primary types of leather that you'll commonly come across. Let me quickly walk you through them:
-
Full-grain leather: This is the highest quality leather. It comes from the top layer of the hide and includes all the grain, which is why it's known as "full-grain". It's more durable and features natural markings, making it more authentic and sought after by artisans and enthusiasts.
-
Top-grain leather: One notch below full-grain is top-grain leather. It undergoes a bit more processing to remove imperfections, resulting in a more uniform appearance but less durability.
-
Genuine leather: Despite what the name suggests, "genuine leather" is actually a lower quality product. It's created from the remaining parts of the hide after the top is split off for the better grades.
-
Bonded leather: This is the lowest quality leather. It's the "fast food" of leather – made up of leftovers, including dust and shavings that are reconstituted with a binding agent, then painted to look like the real deal.
Understanding the type of leather you're working with can dramatically impact the end result of your dyeing process. So, before you start, make sure you know your full-grains from your bonded leathers!
It's fascinating, isn't it? The world of leather is rich and varied, and the better you understand it, the better you'll be able to navigate your leather dyeing journey. I promise, the results are well worth the effort.
📷 Credit: Claridge Leather's Youtube Channel
What Is Leather Dyeing and How Does It Work?
A. What is Leather Dyeing?
When I first heard about leather dyeing, I was intrigued, wondering what it was all about. Well, leather dyeing is an age-old craft that breathes new life into leather items, be it your favorite pair of boots, a beloved handbag, or even a cherished leather sofa. Think of it as a facelift for your leather possessions - transforming old, worn-out, or out-of-fashion colors into something new and exciting.
The process involves applying a special dye to the leather, altering its color while preserving its natural texture and grain. Leather dyeing is not just about changing color; it's a celebration of creativity, a testament to sustainability, and a tribute to craftsmanship. Can you imagine taking a faded old leather jacket and turning it into a vibrant, stylish piece of clothing that reflects your personality? That's the magic of leather dyeing.
Historically, leather dyeing dates back centuries when our ancestors used natural elements like plants, bark, and berries to color their leather goods. It's fascinating to see how this art form has evolved, with modern techniques now offering a broad spectrum of hues and finishes.
B. Why Consider Dyeing Leather?
Now you might wonder, "Why would I consider dyeing leather?". I've asked myself the same question and discovered a world of reasons. The first reason that comes to mind is sustainability. By dyeing your leather goods, you're giving them a new lease on life, extending their usability, and reducing waste. It's a small but significant step towards a more sustainable lifestyle.
Secondly, dyeing leather allows you to customize your belongings, adding a personal touch that reflects your style and taste. You're no longer restricted to factory-made colors. If you want a turquoise wallet or a ruby-red handbag, you can have it!
Lastly, it's about learning a new skill. Dyeing leather might seem intimidating at first, but once you dive in, it's a deeply satisfying craft that encourages mindfulness and patience. Each dyed piece becomes a testament to your creativity and craftsmanship, something to take pride in.
So whether you're looking to revamp your wardrobe, reduce waste, or embrace a new hobby, leather dyeing has something to offer. It's a journey of transformation, not just for your leather goods, but also for you, as you learn to create and appreciate the beauty of dyed leather. Let's explore this captivating craft together, shall we? Remember, your comments, questions, and experiences are welcome. Let's make this a shared journey of discovery!
📷 Credit: Skill Tree's Youtube Channel
What Tools and Materials Do You Need to Dye Leather?
So, you're set on dyeing your leather goods, are you? Well, before we dive into the process, it's crucial we cover our bases, starting with the right tools and materials. I can't stress this enough - having the right tools can make the difference between a masterpiece and, well, a mess.
A. List of Essential Tools for Leather Dyeing
To kick things off, here's a rundown of the essentials you'll need on this leather dyeing journey.
1. Dyes and Pigments
First things first, we can't dye without the dye, can we? Leather dyes are different from the dyes you might use on fabrics. They're specifically formulated to penetrate and color the leather, and you'll usually find them in both water-based and solvent-based varieties. My personal advice? Start with the water-based ones, they're easier to handle for beginners. Plus, they're less toxic, which is always a bonus.
2. Brushes and Daubers
Next up, we've got brushes and daubers. The brush you choose can directly impact the finish of your dye job. Trust me, I've learned this the hard way. The best types of brushes are usually small, rounded ones, as they allow you to get into those hard-to-reach areas and they tend to spread the dye more evenly. Daubers, on the other hand, are excellent for larger surfaces, and they can really speed up the process.
3. Cleaning Supplies
Before even thinking about dye, you've got to ensure your leather piece is squeaky clean. Any dirt or grime can interfere with how the dye absorbs, resulting in an uneven or patchy color. So, grab some mild soap or leather cleaner, a couple of clean cloths, and a soft brush, and get that leather looking spotless. And don't forget the gloves, friends. Dye stains are not easy to get off.
B. Choosing the Right Leather Dye
Ah, now to one of the most fun parts of the process: choosing your dye. This choice will determine the overall look of your dyed leather, so it's worth spending some time on.
1. Factors to Consider
What should you think about when choosing a leather dye? Well, for one, the color. Think about your end goal. What color do you want your piece to be? It's not as straightforward as picking a bottle off a shelf, though. Leather dyes can turn out darker or lighter depending on the leather you're working with. Test a small area first, just to be safe.
The other factor is the type of dye. Remember those water-based and solvent-based dyes we talked about earlier? Well, each has its own set of pros and cons. Water-based dyes, for example, are more eco-friendly and easier to clean up. However, solvent-based dyes can give you more vibrant, longer-lasting colors. It's a tough call, and the choice is ultimately yours.
2. Recommended Brands/Types
As for recommendations, brands like Fiebing's, Angelus, and Tandy Leather offer a variety of high-quality leather dyes. If you're a first-timer, Fiebing's LeatherColors, a water-based dye, is a great place to start. It's easy to use, and they've got a decent color range.
There you have it - your first step into the world of leather dyeing. Remember, folks, the best tool you can have is patience. The rest is just helping hands along the way.
What Safety Precautions Should You Take When Dyeing Leather?
When it comes to dyeing leather, there's more to it than just the beautiful outcome. We've got to talk safety! Now, I know what you're thinking, "I've painted and stained things before, how dangerous could this be?" Trust me, safety in leather dyeing is more important than you might realize.
A. Importance of Safety in Leather Dyeing
1. Potential Hazards
Remember when you were a kid and you used to play with those non-toxic watercolors? Dyeing leather is a whole different ballgame. Some leather dyes, especially those that are oil-based, contain harsh chemicals that can pose a danger if not handled correctly. Inhalation, ingestion, or skin contact with these dyes can cause health problems, ranging from minor irritations to severe allergic reactions.
2. Long-term Implications
It's not just about the immediate effects, either. Regular exposure to these chemicals without proper safety measures could lead to long-term health complications like skin and respiratory disorders. I can't emphasize this enough: the last thing you want is to trade off your health for a beautifully dyed leather piece.
B. Safety Gear and Precautions to Take
Alright, now that we've established the "why," let's move on to the "how." How can we ensure our leather dyeing adventure is both safe and fun?
1. Necessary Safety Equipment
First things first, we're going to need some safety gear. Rubber gloves are a must to protect your skin from direct contact with the dye. Likewise, it's essential to don a pair of safety goggles to shield your eyes from any accidental splashes. Also, if you're using a dye with strong fumes, a respirator mask can be your best friend.
2. Safe Workspace Setup
Now, let's talk workspace. Ensure you're working in a well-ventilated area, preferably with easy access to water for washing off any spills. Keep your dyeing tools organized and out of reach from kids and pets. And remember, safety isn't a one-time thing—it's an ongoing commitment. Always double-check your space for potential hazards before you start, and clean up thoroughly once you're done.
I cannot stress this enough: your stunningly dyed leather item should never come at the expense of your well-being. By recognizing the potential hazards and understanding how to create a safe working environment, you can ensure that your leather dyeing journey is not just a creative endeavor, but a safe one too.
Now, tell me, what are some of the safety precautions you always take when working on DIY projects? Share your tips and tricks in the comments below, and let's learn from each other!
How Do You Prepare Leather for Dyeing?
Before we jump into the nitty-gritty of dyeing, it's essential to understand the preparation process. Treating your leather goods right before the dyeing process can make a world of difference to the final outcome.
A. Cleaning and Conditioning
1. Step-by-step Cleaning Process
Firstly, let's talk about cleaning. The trick to successful leather dyeing is starting with a clean, grime-free surface. Here's a simple, foolproof process:
- Start by dusting off your leather item with a soft, dry cloth to remove loose dust and dirt particles.
- Then, mix a few drops of mild dish soap into a cup of warm water. Dip a soft cloth into this solution, wring out the excess water, and gently wipe the leather surface. Remember, you're not trying to soak the leather, just clean it.
- Once you've cleaned the entire surface, wipe it down with a dry cloth and allow it to air dry naturally. Never expose leather to direct heat as it can dry out and crack.
Believe me, this simple cleaning process can drastically improve the dye's adherence and ultimately the final result.
2. Conditioning: Why and How?
After cleaning, it's time for conditioning. You might be wondering why conditioning is necessary. Well, it's simple. Conditioning leather can restore its natural oils, keeping it soft and supple. It helps in preventing the leather from becoming stiff or brittle post-dyeing.
Here's how you can condition your leather:
- Apply a small amount of leather conditioner onto a soft cloth.
- Gently rub it into the leather in a circular motion, making sure to cover the entire surface.
- Allow the conditioner to soak into the leather, then wipe off any excess.
- Leave the leather to dry naturally before proceeding with the dyeing process.
Conditioning helps ensure that the dye will be absorbed evenly, giving you a smooth and even finish.
C. Stripping Old Dye
Stripping old dye is a crucial step if you're working with previously dyed leather. This is to make sure that the old color doesn't interfere with the new one.
1. When and Why You Should Strip Old Dye
In most cases, dyeing over an old dye job could result in a muddled color that's not what you envisioned. Stripping the old dye gives you a blank canvas to work with, ensuring that the new color shows up as true as possible. However, this process might not be necessary for darker dyes or if you're simply re-dyeing the leather the same color.
2. Process of Stripping Old Dye
Now, let's talk about how to strip old dye:
- Apply a generous amount of leather preparer or deglazer to a cloth.
- Rub it into the leather, reapplying as needed until the old dye has been removed.
- Wipe off any remaining residue with a clean cloth.
- Let the leather dry completely before proceeding to the next step.
Remember to always work in a well-ventilated area when using a leather preparer or deglazer, as these products can have strong fumes.
There you have it. Following these steps to clean, condition, and strip old dye from your leather can set you up for success in your leather dyeing project. Up next, we'll be delving into the exciting part - applying the dye. So, stick around!
How Do You Apply Dye to Leather?
Alright, this is where the magic happens. We've now arrived at the part where we breathe new life into your leather item by infusing it with color. Trust me, the process is nothing short of an art form, and I'm here to guide you through it.
Step-by-Step Guide to Applying Dye
Initial Application
Think of the initial application as setting the stage for a grand performance. You wouldn't just jump into the final act, would you? Similarly, with dyeing leather, the initial application lays the foundation for the ensuing transformation.
The first thing you need to do is ensure your leather is clean and ready to absorb the dye. Arm yourself with a sponge or a dauber; these tools are ideal for the task at hand.
Now, take your chosen leather dye and dip the applicator lightly into it. Be cautious and remember: moderation is key here. Dabbing a bit of dye and spreading it evenly across the leather is the method to adopt. Visualize massaging the leather surface in gentle, circular motions. This meticulous process will ensure a uniform distribution of the dye.
Layering and Building Up Color
Perhaps you've completed the first round of dyeing and you're sitting there, a bit puzzled, thinking, "This isn't the vibrant hue I envisioned." Hold on, don't fret just yet! Leather dyeing is a layered affair. The secret to achieving that rich, deep color lies in the process of adding layers.
Once your initial layer has dried, go ahead and add another one. Subsequent layers give the color depth and intensity, enabling you to fine-tune the shade. Remember, patience is your ally in this process. Allowing each coat to dry before applying the next is the key to achieving the perfect shade.
Common Mistakes and How to Avoid Them
Over-Dyeing
As you get immersed in the process, you might be tempted to keep layering on the dye, hoping to intensify the color. Be careful not to fall into the over-dyeing trap. Adding too many layers can result in a patchy, inconsistent finish. It can also compromise the leather's texture and longevity, making it harder and less durable. Stick to a few well-placed coats, and let each one dry thoroughly before deciding if more is needed.
Uneven Application
Uneven dyeing is another common pitfall. Rushing through the process or applying too much dye in certain areas can lead to an uneven finish. To prevent this, start with a smaller quantity of dye and ensure it's evenly distributed across the leather. Our circular motion technique comes in handy here, creating a uniform and even color layer.
Remember, dyeing leather isn't just about revamping an item; it's a journey of creative exploration. Don't be disheartened if you don't nail it on the first try. Like any skill, practice will lead to improvement. So, put on your artisan's hat, pick up that dye, and start transforming your leather!
How Do You Seal Leather After Dyeing?
After you've completed the exhilarating process of dyeing your leather, there's one final step we must undertake. It might seem trivial to some, but trust me, it's of monumental importance: sealing the leather. This stage seals the deal - quite literally - and ensures the longevity of your hard work.
A. Why Sealing is Essential
1. The Role of Sealants
As a leather crafter, I often liken sealants to an invisible shield. Imagine a castle protected by its walls. The royal family residing inside is your newly dyed leather. The walls? Those are your sealants. Sealants play an essential role in protecting the dye from external factors.
They form a protective layer on your leather surface, safeguarding the dye from environmental elements like moisture and sunlight. This shield allows the dye to remain vibrant, luscious, and glossy for a longer period. So, as you can see, never underestimate the power of this invisible shield.
2. What Happens If You Don’t Seal
Leaving leather unsealed after dyeing is similar to skipping sunscreen on a summer beach day. Without a protective barrier, the harsh UV rays - or in this case, daily wear and tear - can cause your beautiful dye job to fade or even peel off. Unsealed leather is more vulnerable to scratches, stains, and damage. So, unless you're looking for a quickly aged look, you'd be wise to invest in a good leather sealant.
B. Best Methods for Sealing Dyed Leather
1. Guide to Choosing the Right Sealant
Now, when it comes to choosing the perfect leather sealant, we're spoiled for choice. Leather sealants range from acrylic resolene, waxes, oils to silicone sprays. Each comes with its pros and cons.
Acrylic resolene, for example, offers excellent waterproofing abilities and a glossy finish. But remember, this one can darken your dyed leather. On the other hand, waxes and oils create a more natural finish, maintaining the original color while adding a subtle sheen.
I always recommend considering factors like the final look you desire, the item's use, and your local weather conditions before you make your choice. And of course, test your sealant on a scrap piece of leather before applying it to your final piece. Better safe than sorry!
2. Sealing Process and Techniques
Finally, let's chat about the sealing process. It's simple, I promise! Start by ensuring your dyed leather is completely dry. Then, using a clean, soft cloth or a sponge, apply your chosen sealant evenly across the leather's surface. Remember to use a circular motion for uniform coverage and allow it to soak into the leather.
Repeat the process if necessary, and don’t forget to let it dry completely before using. For sealants like waxes and oils, buff the leather after it's dried for an extra sheen. And voila! Your dyed leather is now sealed and ready to flaunt.
📷 Credit: Eleana Workshop's Youtube Channel
What Other Leather Dyeing Techniques Can You Try?
Leather dyeing is not limited to a single method. Instead, it's a realm of infinite creative possibilities. In this section, we'll discover some other popular techniques for dyeing leather. Whether you're a seasoned leatherworker or a curious novice, knowing different approaches can enhance your skills and open up new avenues for creativity.
Hand Rubbing Technique
Hand rubbing is a traditional and straightforward method of applying dye to leather. This technique gives you maximum control over the dye application, making it a great option for beginners.
- Prepare your leather by cleaning and conditioning.
- Wear gloves to protect your hands from the dye.
- Dip a lint-free cloth into the dye and apply it to the leather in circular motions.
- Let the dye dry completely before applying another layer.
Hand rubbing is perfect for creating a vintage, worn-in look. However, it might take a bit more time and patience to achieve a deep, uniform color compared to other techniques.
Airbrushing Technique
Airbrushing is a modern method that allows for even distribution of dye, especially over large surfaces. It's perfect for achieving gradients, shadows, and other creative effects. However, it requires special equipment and a bit more expertise.
- Prepare your leather and place it on a clean, flat surface.
- Fill the airbrush with your chosen dye.
- Hold the airbrush about 6-8 inches away from the leather surface and apply the dye in even strokes.
- Let the dye dry before adding additional layers.
While airbrushing can give your leather piece a professional finish, it might take a bit of practice to perfect this technique.
Dip Dyeing Technique
Dip dyeing involves immersing the entire leather piece into a vat of dye. It's an effective way to achieve an intense, uniform color, but it uses more dye than other methods.
- Prepare a dye bath by mixing your dye in a large container.
- Immerse the leather completely into the dye bath.
- Stir gently to ensure even distribution of dye.
- Remove the leather from the bath and hang it to dry.
Dip dyeing can create bold, vibrant colors. However, it can also change the texture of the leather, making it stiffer.
Each of these dyeing techniques has its pros and cons, and the choice depends on the look you want to achieve, the materials at hand, and your skill level. Remember, dyeing is a form of art. It's all about experimentation and finding what works best for you. Don't be afraid to try different techniques and make the process your own. Have you tried any of these methods before? Do you have any tips to share? Let's discuss in the comments below!
What Are the Best Advanced Leather Dyeing Tips?
While understanding the basics is crucial, it's also fun to dive into the world of advanced leather dyeing techniques. By experimenting and adding a dash of creativity, you can achieve unique and impressive results that truly reflect your personal style. Whether you want to create distinctive patterns and textures or blend a palette of colors for an extraordinary finish, let's explore the realm of advanced dyeing techniques together.
A. Advanced Dyeing Techniques for Creative Effects
1. Creating Patterns and Textures
In my experience, I've found that patterns and textures can add a whole new dimension to your dyed leather. Have you ever considered leather dyeing as an art form? Well, I have, and I assure you it's a fascinating one!
For starters, you might want to experiment with a sponging technique. By using a natural sea sponge to apply the dye, you can achieve an organically uneven, but visually appealing pattern. Remember that less is more - dab the sponge lightly, and don't rush the process.
Alternatively, if you're looking for a bold, distinctive look, stencils are your best friend. They allow you to create detailed designs that truly stand out. You could choose geometric patterns or even intricate floral designs. It's all about letting your creative spirit roam free.
2. Mixing Colors
Mixing colors is another technique that can add depth and originality to your leather goods. By exploring this, I found an unexpected joy in the endless possibilities it offers. However, it's essential to remember that all dyes don't mix the same way your primary school paint did!
Make sure you're using dyes from the same brand or at least dyes that you know are compatible. Start by mixing in small amounts, and remember to document your "recipe." Nothing is more frustrating than finding the perfect shade and not being able to recreate it!
B. Maintaining Your Dyed Leather Products
After investing time and effort into dyeing your leather, you'll want to ensure it stays looking fantastic. Here's what I've learned about caring for dyed leather over the years.
1. Routine Care and Cleaning
Regular care goes a long way in maintaining the vibrancy of your dyed leather. Gentle cleaning with a damp cloth can remove dust and dirt without damaging the dye. For stubborn stains, a mild leather cleaner can work wonders.
Remember, it's not only about cleaning, but conditioning too. Leather, much like our skin, can dry out over time. A quality leather conditioner keeps your dyed leather supple and prevents cracks. Trust me, your leather will thank you for it!
2. Restoration and Repair
Accidents happen, and colors fade, but that doesn't mean the end for your favorite dyed leather item. You can breathe new life into your leather by re-dyeing it. It might sound daunting, but with the techniques you've learned, you're more than capable.
In case of scratches or cuts, leather repair kits can be a lifesaver. Choose a kit that matches your dyed leather, follow the instructions carefully, and your leather can look as good as new.
Remember, every leather item tells a story, and each mark adds to its character. But with the right care and maintenance, your dyed leather can remain as vibrant and captivating as the day you transformed it. Isn't it exciting to think that you hold the reins in this journey of leather dyeing?
📷 Credit: Weaver Leather Supply's Youtube Channel
What Are the Do's and Don'ts of Leather Dyeing?
Leather dyeing is a craft, one that requires an understanding of the dos and don’ts that define the process. If you're just starting out or are an experienced hand seeking to refresh your knowledge, this section is tailor-made for you.
A. List of Do’s and Don’ts
1. Do’s
-
Test your dye first: Don't let your precious leather item be the guinea pig. Always test your dye on a small, inconspicuous patch or a scrap piece of leather to ascertain the color and effect.
-
Clean your leather: Before embarking on your dyeing adventure, ensure that the leather is clean. Dirt, grime, or old polish can interfere with the dyeing process.
-
Use gloves and protective wear: Dyeing can be a messy affair and the pigments can be harsh on your skin. Plus, who wants multi-colored hands after a dyeing session?
-
Seal your dyed leather: Sealing provides a protective layer, locks in the color, and gives a professional finish to your dyed leather.
2. Don’ts
-
Don't rush the process: Good things take time, so does leather dyeing. Rushing can lead to mistakes, uneven dyeing, and an unsatisfactory result.
-
Avoid over-saturating the leather: More dye doesn't mean deeper color. Over-saturation can darken the leather excessively and make it stiff.
-
Don’t neglect safety measures: Be it ventilation, gloves, or workspace setup, never compromise on safety.
-
Avoid direct sunlight while drying: Direct sunlight can cause the color to fade or change. Always dry your leather in a cool, shaded area.
B. Expert Tips for a Successful Dyeing Experience
Now, you've got a basic idea of the do's and don'ts in leather dyeing, but what about those little tricks that experts swear by? Let's delve into that next.
1. Tips from Professionals
-
Condition your leather post-dyeing: Professionals recommend applying a leather conditioner after dyeing. It helps to restore the leather's suppleness and keeps it looking great.
-
Use a wool dauber for application: Wool daubers provide an even spread of the dye on the leather surface, ensuring a uniform color.
-
Dye in circular motions: For an even coat, move your applicator in circular motions. It helps the dye to penetrate better and gives a more professional finish.
2. Community Tips
-
Let your dyed leather rest: Members from the leather dyeing community suggest leaving your dyed leather undisturbed for a few hours or even overnight before applying a sealer.
-
Reuse old leather for practice: Don't throw away those old leather scraps. They can be excellent practice materials for your dyeing adventures.
-
Experiment with mixing colors: Feel free to mix different dyes to create a unique color. Remember, it's all about personalizing and creating something uniquely you.
I hope these insights are helpful in your leather dyeing journey. Got any tips or experiences to share? Join the conversation in the comments section!
Keep in mind that just like any other craft, leather dyeing is a skill that improves with practice. Mistakes are a part of the learning curve, but they provide valuable lessons that refine your technique. So, gear up and let your creativity flow. Happy dyeing!
X. Conclusion
We've journeyed together through the intricacies of leather dyeing, right from understanding the very fabric of leather to the moment you put the finishing touches on your dyed masterpiece.Throughout this process, remember, you're not just dyeing leather; you're creating something unique, something that's a part of you.
Let me tell you from personal experience, leather dyeing is an art form. Like any art, it requires practice and patience. Your first attempt may not turn out exactly as you pictured, but don't get disheartened.
Each attempt brings you closer to perfection, each mistake a lesson learned. And when you finally hold up that piece of leather, now vibrant and personal, all those trials will be worth it.
From my journey to yours, remember, patience, persistence, and a little bit of dye can transform the ordinary into extraordinary.
As we close this guide, I urge you to embrace the process, to let your creativity run wild, to make mistakes and learn from them. After all, leather dyeing is more than just a process; it's a craft, it's an expression, it's a journey of transformation.
In the words of Leonardo da Vinci, "Art is never finished, only abandoned." So go on, pick up that piece of leather, your art is waiting to be discovered.
XI. Frequently Asked Questions
1. What Are the Best Dyes for Leather?
There are various types of leather dyes in the market, each with its unique properties. Some of the highly recommended ones include water-based dyes, oil dyes, and alcohol-based dyes. The best dye for you would depend on your specific project and the type of leather you're working with.
2. Can I Dye All Types of Leather?
Not all types of leather are suitable for dyeing. For instance, suede and nubuck can be challenging to dye due to their unique textures. It's best to conduct a patch test before dyeing the entire leather piece.
3. Is Dyeing Leather at Home Safe?
Yes, dyeing leather at home is safe as long as you take proper precautions. Ensure that you work in a well-ventilated area, wear protective clothing, and carefully follow the instructions on the dye package.
4. What Are the Key Mistakes to Avoid When Dyeing Leather?
Common mistakes include not prepping the leather properly, using the wrong type of dye, applying too much dye at once, and not sealing the dye properly. Avoid these by following the steps laid out in this guide.
5. Can I Change the Color of My Dyed Leather?
Yes, you can change the color of previously dyed leather. However, it's easier to dye leather a darker shade than it is to lighten it. You might need to use a leather preparer or deglazer to remove the old dye before applying the new one.
6. What to Do If the Color Isn’t as Expected?
If the color isn't as expected, you can try to apply additional coats of dye. Remember, it's always better to start with a lighter shade and gradually build up the color.
7. How Do I Maintain My Dyed Leather?
Maintaining your dyed leather involves regular cleaning and conditioning. Avoid exposing it to extreme temperatures or moisture. For dyed leather items like bags or shoes, consider using a leather protector spray.
8. Can I Dye Leather Multiple Times?
Yes, you can dye leather multiple times, but each subsequent dyeing can affect the leather's texture and longevity. It's always best to aim for the right color in the first or second attempt.
9. How Long Will the Dye Last?
The longevity of the dye depends on the quality of the dye, how well it was applied, how often the item is used, and how well it's maintained. With proper care, a good leather dye can last several years.
10. Can I Use Household Products to Dye Leather?
It's not recommended to use household products to dye leather as they may not bind well to the leather and could cause damage over time. Always use dyes specifically formulated for leather for best results.
📫 Related Blog Posts:
📌 What is Eco Leather? The Future of Sustainable Fashion
📌 Embossed vs. Engraved Leather: The Artistic Duel Unveiled
📌 DIY Leather Conditioners: Nature's Touch for Timeless Elegance
📌 What is PU Leather? The Secrets of an Alternative to Real Leather
📌 What is Saddle Leather? The Ultimate Cowboy Material
📌 How to Clean Mold Off Leather? [Step-by-Step Guide]
📌 What is Split Leather? From History to Care Tips and Beyond
📌 What is Cabretta Leather? An In-Depth Guide
📌 What is Tooling Leather? A Comprehensive Guide
📌 What is Distressed Leather? Unraveling the Charm of Worn Elegance
📌 Is Leather Waterproof? An Analysis of Leather’s Resistance to Water
📌 What is Full Grain Leather? History, Craftsmanship & Timeless Appeal
📌 How to Stretch Leather Shoes? An Extensive Guide to Comfortable Footwear
📌 How to Make Fruit Leather? From Fruit to Fabulous
📌 Best Leather Anniversary Gifts: Celebrate Love with Timeless Elegance

Leave a comment