How to Stiffen Leather Like a Pro? From Supple to Sturdy
Reading Time: about
How to stiffen leather is a question that has intrigued artisans for centuries. Leather, with its rich texture and undeniable durability, has been a material of choice for craftsmen across the ages.
When you pick up a leather-bound book, feeling its rigid cover, or admire the structured base of a luxury leather handbag, you're witnessing the culmination of age-old techniques and modern innovation. At the heart of these creations is the art of leather stiffening.
This process, steeped in tradition and refined over generations, transforms the naturally supple leather into items of strength and resilience. But how does this transformation occur? And once the leather has been stiffened, how do we ensure its longevity?
Journey with us through this comprehensive guide as we unravel the mysteries of leather stiffening. From ancient methods passed down through the ages to contemporary techniques that cater to modern demands, we'll explore the fascinating world of leatherwork.
Summary
- 1. What Factors to Consider When Stiffening Leather? Understanding Leather and Its Properties
- 2. Water-Based Techniques to Enhance Leather Rigidity
- 3. Oven-Based Techniques for Leather Hardening
- 4. Compression Molding and Related Techniques
- 5. Resin Coating: A Modern Approach to Stiffening Leather
- 6. How To Care For Stiffened Leather?
- 7. Frequently Asked Questions
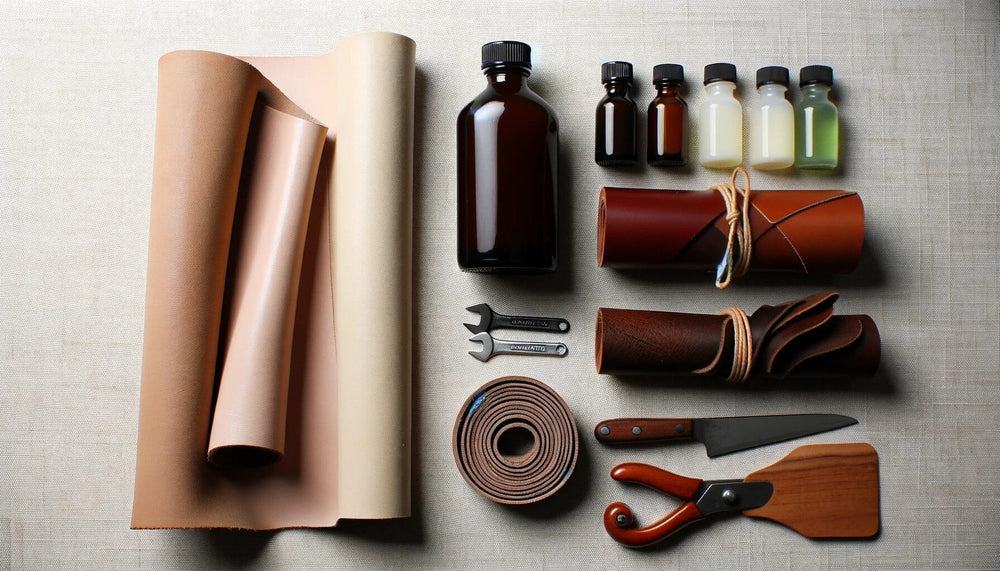
I. What Factors to Consider When Stiffening Leather? Understanding Leather and Its Properties
When we talk about leather, it's essential to grasp its inherent nature and the vast spectrum of types available. This understanding is pivotal, especially if you're considering altering its texture or stiffness.
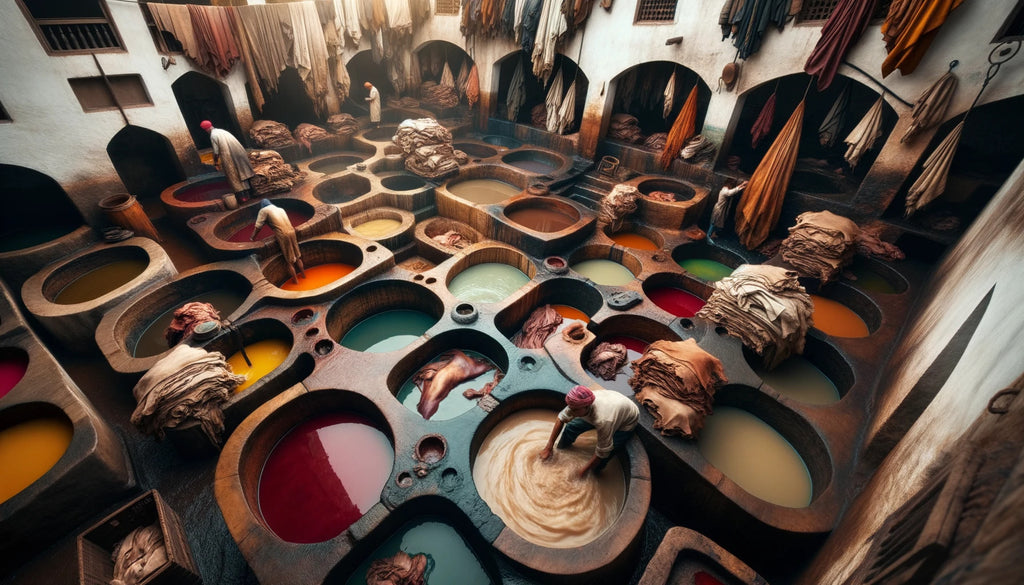
1. What is Leather?
At its core, leather is a natural material derived from animal hides, primarily cattle. It undergoes a process called tanning, which transforms the raw hide into a durable and flexible material.
Now, you might wonder why leather, known for its robustness, needs stiffening. The answer lies in its natural flexibility. While leather is sturdy, it's also pliable, making it perfect for a myriad of applications, from jackets to handbags. But sometimes, for specific projects, we need it to hold a particular shape or offer more rigidity.

2. Leather Types and Their Suitability for Stiffening
Navigating the world of leather can be a tad overwhelming, given the plethora of types available. So, let's break it down:
| Leather Type | Can Be Stiffened? | Notes and 💡 Expert Tips |
|---|---|---|
| Vegetable-Tanned | Yes | The darling of the leather world. It's receptive to both water and heat but can darken when exposed to these elements. |
| Chrome-Tanned | Limited | Known for its softness due to chemical treatments. However, it can lose its vibrant hue or become uneven when stiffened. |
| Oil-Tanned | Limited | Its natural softness comes from the oils infused during tanning. Stiffening might compromise its water-resistance. |
| Nubuck | No | Think of it as leather's delicate cousin. Its soft, textured surface isn't ideal for stiffening. |
| Suede | No | Similar to Nubuck but with its own unique texture. Best left in its natural state. |
| Full-Grain | Yes | The crème de la crème of leather. While it can be stiffened, it's crucial to preserve its innate beauty and texture. |
| Top-Grain | Limited | A step below full-grain, its surface is sanded and refinished, making it less adaptable to stiffening. |
| Patent Leather | No | Its glossy finish is its trademark. Stiffening can mar its iconic shine. |
| Bonded Leather | No | A composite of leather scraps. Given its nature, it's not the best candidate for stiffening. |
3. Why Some Leathers Can't Be Stiffened
Now, I've often been asked, "Why can't all leathers be stiffened?" The answer isn't straightforward, but I'll give it a shot. Each leather type, from the luxurious full-grain to the glossy patent leather, has its unique properties. These characteristics stem from the various tanning processes and treatments they undergo.
Some leathers, like vegetable-tanned, are like sponges, absorbing water and adapting to heat. Others, designed to be soft or with specific finishes, don't take too kindly to stiffening attempts. Trying to alter them can sometimes lead to heartbreak, with the leather getting damaged or not yielding the desired results.
4. Desired Level of Stiffness
Understanding the End Goal
Before diving into the stiffening process, it's essential to visualize the end product. Do you want a leather piece as rigid as a board or just a tad firmer than its original state? By understanding your desired outcome, you can tailor the stiffening process accordingly.
Adjusting Techniques Based on Requirements
If you're aiming for a mildly stiffer feel, short soaking times or mild baking durations might suffice. However, for a rock-hard finish, you might need to pull out the big guns like resin coating or prolonged baking. Always start with milder methods. It's easier to increase stiffness incrementally than to reverse over-stiffening.
Durability and Longevity: How Stiffening Affects the Lifespan of Leather
Stiffening leather is a bit like giving it a new lease on life. However, just as with any transformation, there are trade-offs. While you gain rigidity, you might compromise on the leather's natural flexibility. Over time, this can lead to cracks or brittleness, especially if the leather is repeatedly bent or folded.
II. Water-Based Techniques to Enhance Leather Rigidity
When it comes to leathercraft, I've often been asked about the best ways to give leather that firm, structured feel. Water-based methods are among the most traditional and effective techniques we use. Let's dive into these methods and understand how they can transform your leatherwork.
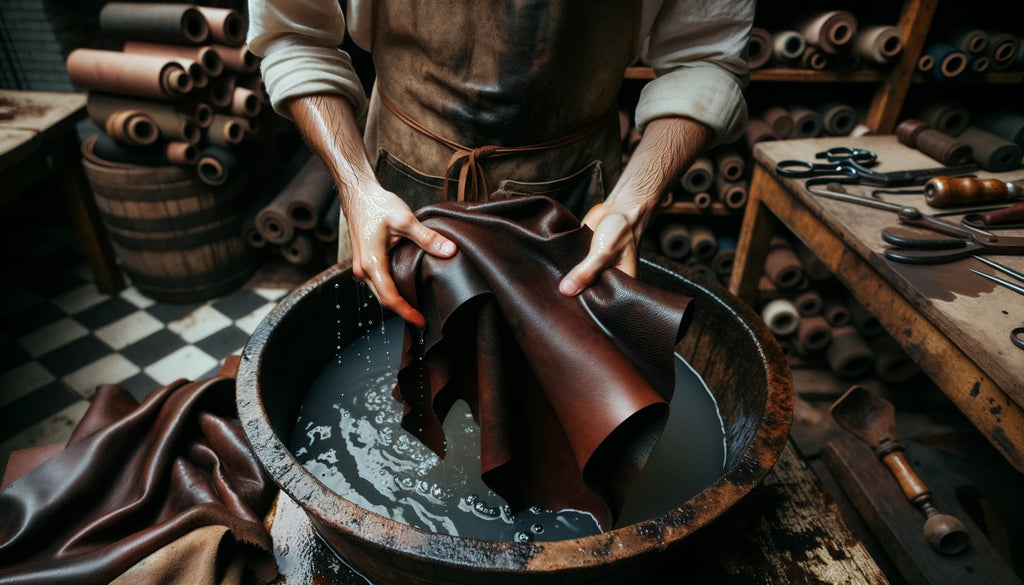
1. Cold Water Soaking: A Time-Honored Tradition
Cold water soaking is one of the oldest and most trusted methods to stiffen leather. It's a technique that has been passed down through generations of leather craftsmen, and for a good reason. It's simple, effective, and requires minimal tools. Let's delve into this method and understand how you can achieve the perfect stiffness for your leather piece.
🧰 Tools & Resources:
-
A Spacious Basin or Tub: Choose a basin that can comfortably accommodate your leather piece, ensuring it can be fully submerged.
-
Clean, Preferably Distilled, Water: The quality of water you use can significantly impact the final result. Distilled water is free from minerals and impurities, ensuring no residues or stains are left on your leather.
📖 Step-by-Step Guide:
- Preparing the Water Bath: Start by filling your chosen basin with cool to room temperature water. I've always been an advocate for distilled water in leatherwork. It ensures that your leather remains pristine, free from any potential mineral-induced stains.
- Submerging the Leather: With gentle hands, submerge your leather piece into the water. It's essential to ensure that the leather is entirely under the water, with no air bubbles trapped underneath. These bubbles can lead to uneven soaking, which we want to avoid.
- The Soaking Process: Allow your leather to soak in its tranquil bath for about 30 minutes to an hour. This duration is crucial as it lets the leather fibers absorb the moisture, initiating the stiffening process. While it might be tempting to rush this step, patience is key here.
- Drying and Shaping: Once the soaking time is up, carefully lift the leather out of the water. Using a soft, clean cloth, pat the leather dry, ensuring you don't rub or scrub. Now comes the fun part – shaping. Mold the leather into your desired shape or form. As the leather dries, it will retain this shape, resulting in a beautifully crafted, stiffened piece.
💡 Expert Tips:
-
The Distilled Water Difference: Always opt for distilled water. This might seem like a minor detail, but it can make a world of difference. Distilled water ensures that your leather remains free from unsightly mineral marks or stains.
-
Sun-Drying? Think Again: While it might be tempting to dry your leather piece under the sun, especially if you're in a hurry, I'd advise against it. Direct sunlight can lead to uneven discoloration, taking away from the natural beauty of your leather. Instead, opt for a shaded, well-ventilated area for drying.
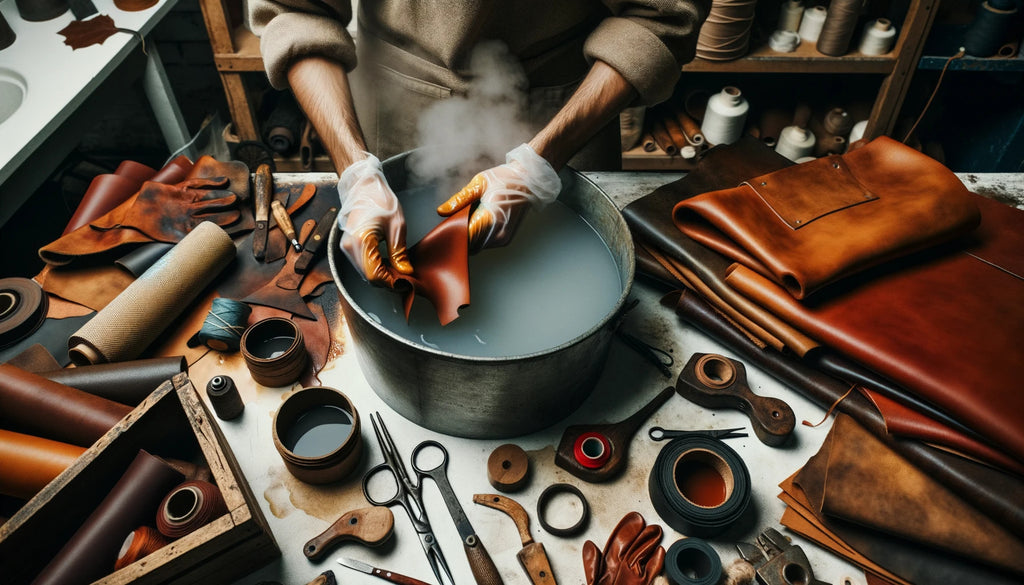
2. Hot Water Soaking: For the Adventurous Craftsman
Hot water soaking is a method that might seem a tad unconventional to the uninitiated. However, for those in the know, it's a quick and effective way to stiffen leather, giving it a unique texture and finish. While it requires a bit more attention to detail than cold water soaking, the results can be truly remarkable. Let's dive into this technique and explore how you can master it.
🧰 Tools & Resources:
-
A Large Pot: This will serve as your primary vessel for heating the water. Ensure it's spacious enough to accommodate the leather piece you intend to stiffen.
-
A Reliable Thermometer: Precision is key in this method. A good thermometer will help you monitor and maintain the exact water temperature required for optimal results.
-
Clean Water: As with the cold water method, the quality of water matters. While distilled water is ideal, clean tap water can also suffice for this method.
📖 Step-by-Step Guide:
- Preparing the Hot Bath: Begin by filling your pot with water. Place it on a heat source and, using your trusty thermometer, start monitoring the temperature. Your goal is to heat the water to precisely 180°F (82°C). It's essential to ensure the water is hot but not boiling. Boiling water can be too harsh on the leather, causing irreversible damage.
- The Quick Dip: Once you've achieved the desired temperature, it's time for the leather's brief rendezvous with the hot water. Gently submerge the leather piece, ensuring it's fully immersed. Let it soak for a short duration of 30 seconds to a minute. As the leather interacts with the hot water, you'll observe subtle changes in its texture and appearance.
- Shaping and Drying: After the quick soak, it's time to remove the leather from the water. Using tongs or, if you're feeling particularly adventurous, gloved hands, carefully lift the leather out. Now, mold and shape the leather into your desired form. As it air dries, the leather will not only retain this shape but also gain a significant amount of rigidity.
💡 Expert Tips:
-
Temperature Matters: It's crucial to maintain the water temperature at 180°F (82°C). Overheating can lead to unexpected changes in the leather's properties, potentially ruining your project. Always keep a close eye on that thermometer!
-
Test Before You Dive: If you're new to this method or working with a particular type of leather for the first time, always test a small, inconspicuous section first. This precautionary step ensures you get the desired results without any unpleasant surprises.
-
Safety First: Remember, you're working with hot water, and leather can retain heat for a while. Always handle the leather with care after the soak. Using tongs or protective gloves can prevent any accidental burns.
In my years of working with leather, I've found that these water-based methods, though simple, can produce remarkable results. They're a testament to the fact that sometimes, traditional methods stand the test of time for a reason.
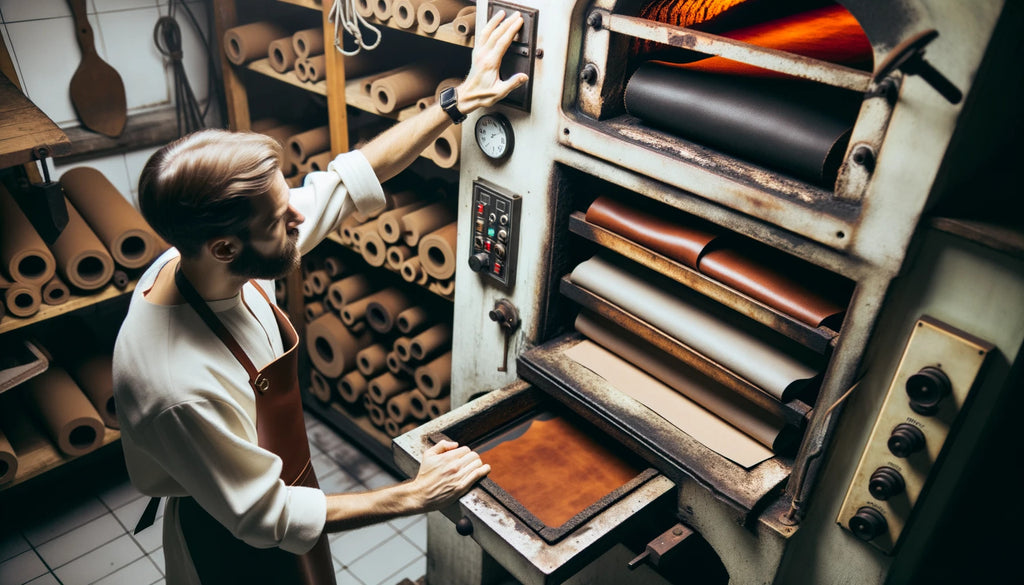
III. Oven-Based Techniques for Leather Hardening
One of the methods I've come to appreciate over the years is using the oven. Yes, the same oven where you bake your favorite cookies! Let's delve into how this household appliance can be a leatherworker's best friend.
Baking Your Leather: A 📖 Step-by-Step Guide
The art of leather crafting often requires innovative techniques to achieve the desired results. One such method, which might surprise many, is baking. Yes, the same process you use for your favorite cookies can also be employed to give leather that perfect stiffness. Let's explore this intriguing method and understand how to bake leather to perfection.
🧰 Tools & Resources:
-
Oven: A standard kitchen oven will do the trick. Ensure it's clean and free from any food residues that might affect the leather.
-
Oven Mitts: Safety is paramount. A good pair of oven mitts will protect your hands from the heat.
-
Baking Tray: This will serve as the platform on which your leather piece will bake. Ensure it's clean and dry.
📖 Step-by-Step Guide:
- Setting the Stage: Before diving into the baking process, it's essential to set the stage. Start by preheating your oven to a gentle 120°F (50°C). This temperature is optimal as it's warm enough to stiffen the leather without causing any damage or alterations to its natural properties.
- Molding and Shaping: This step is where your artistic flair comes to the fore. Mold and shape the leather into your envisioned form. Whether you're crafting a chic wallet, a stylish belt, or a unique accessory, ensure the leather is shaped precisely as you want it. Once you're satisfied with its form, place the leather piece carefully on your baking tray.
- The Baking Process: With your leather shaped and ready, slide the baking tray into the preheated oven. Let the leather bake for about 10-15 minutes. Think of this process as akin to a potter baking clay to set and harden it. The gentle heat will slowly stiffen the leather, giving it the desired rigidity.
- Evaluation Time: After the initial 10-15 minutes, it's time to evaluate. Carefully, using your oven mitts, remove the tray and check the leather's stiffness. If it hasn't achieved the rigidity you're aiming for, don't fret. Place it back in the oven for an additional 5 minutes. Remember, it's always better to check periodically than to over-bake.
- Cooling Down: Once you've achieved the perfect stiffness, remove the leather from the oven. Place it in a safe spot and let it cool down naturally. As it cools, the leather will further set, retaining the shape you molded earlier.
💡 Expert Tips:
-
Eyes on the Prize: Leather can be sensitive to prolonged heat. Always keep a watchful eye during the baking process. Over-baking can lead to the leather becoming brittle, which is something we want to avoid at all costs.
-
Safety Above All: Never underestimate the heat of a baking tray, even at 120°F (50°C). Always use oven mitts when handling the tray to prevent any accidental burns.
-
Even Heat is Key: An oven with even heat distribution ensures that the leather stiffens uniformly. If you're aware of any hot spots in your oven, be sure to rotate the tray periodically to avoid uneven stiffening.
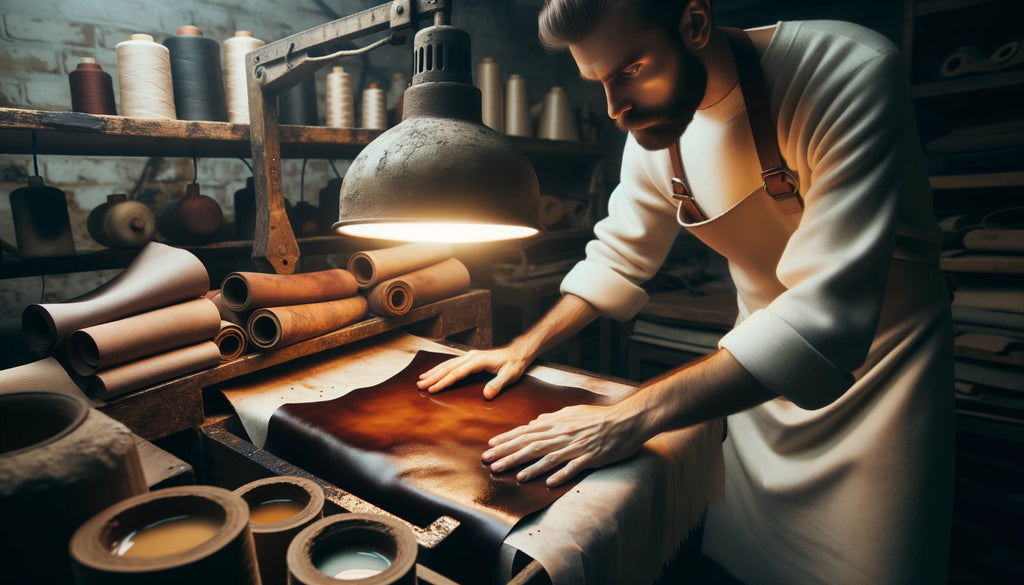
2. Dry Baking with Wax: A Glossy Finish
Achieving a glossy finish on leather is an art that requires precision, patience, and the right technique. Dry baking with wax is one such method that not only stiffens the leather but also imparts a beautiful sheen to it. This method combines the age-old technique of waxing with modern baking, resulting in a finish that's both durable and aesthetically pleasing. Let's delve deeper into this method and understand how to perfect it.
🧰 Tools & Resources:
-
Oven: A standard kitchen oven is essential for this method. Ensure it's clean and free from any residues.
-
Double Boiler: This tool is crucial for melting the beeswax evenly without direct heat, which can cause the wax to burn.
-
Paintbrush: A medium-sized paintbrush will help in applying the melted wax onto the leather.
-
Beeswax: The star of the show. Beeswax not only stiffens the leather but also gives it a glossy finish.
📖 Step-by-Step Guide:
- Warming Up: Start by preheating your oven to 200°F (90°C). This temperature is slightly higher than the previous method, as it's ideal for the wax application process.
- Initial Baking: Place your leather piece on a baking tray and slide it into the preheated oven. Let it bake for a solid 30 minutes. This initial baking prepares the leather for the wax application, ensuring it adheres well.
- Wax On: While your leather is baking, it's time to prepare the beeswax. Using a double boiler, gently melt the beeswax. The scent of melting beeswax is reminiscent of traditional leather workshops and adds to the overall experience.
- Application: Once your leather is out of the oven and the beeswax is melted, it's painting time. Dip your paintbrush into the melted wax and apply a thin, even layer onto the leather. Ensure the entire surface is covered. This wax layer not only stiffens the leather but also imparts a glossy sheen that's visually appealing.
- Final Bake: With the wax applied, return the leather to the oven for another 10 minutes. This final bake ensures the wax sets into the leather, giving it durability and that desired glossy finish.
- Polishing Touch: After the final bake, let the leather cool down. Once it's at room temperature, take a soft cloth and buff the leather's surface. This buffing enhances the leather's shine, making it look even more professional. It also smoothens out any uneven wax applications, ensuring the finish is consistent.
💡 Expert Tips:
-
Smooth Melting: It's vital to ensure the beeswax is thoroughly melted. Any clumps or uneven melting can lead to inconsistencies in the final product.
-
Safety Precautions: Working with wax, especially melted wax, requires caution. Always work in a well-ventilated area and be mindful of any drips or spills.
-
The Importance of Buffing: Don't skip the buffing step. It not only elevates the leather's appearance but also its tactile feel, making it a pleasure to touch and use.
Using the oven for leatherwork might sound unconventional, but it's a technique that's stood the test of time. Whether you're aiming for a matte finish with baking or a glossy one with wax, the oven has got you covered.
IV. Compression Molding and Related Techniques
When I first ventured into the world of leather crafting, I was amazed at the sheer versatility of leather. It can be soft and supple, or hard and rigid, depending on the treatment it undergoes. One of the most fascinating methods I've come across to transform leather's texture is compression molding. Let's dive into this technique and its close relative, the hammer method.
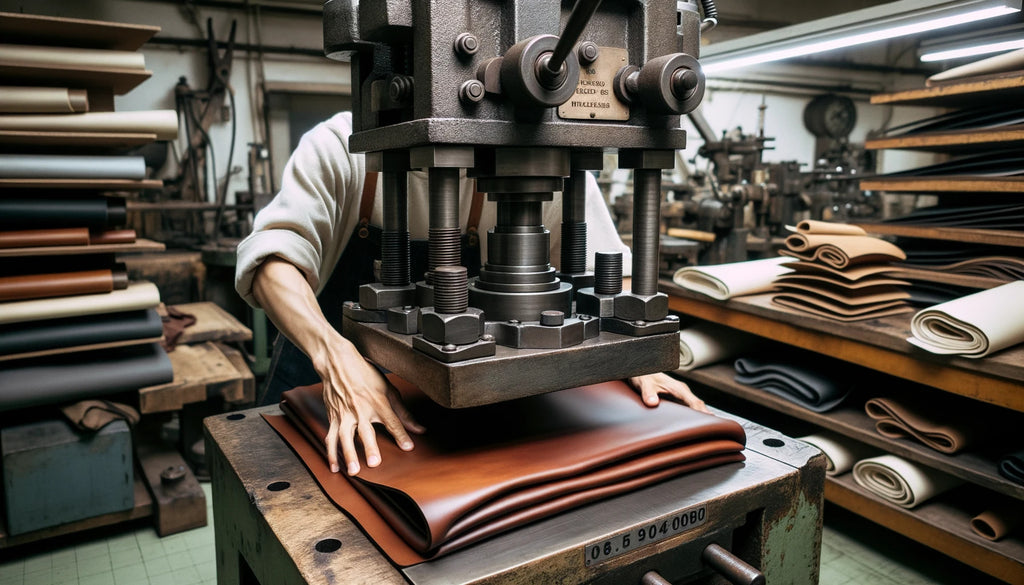
1. Compression Molding: A Deep Dive
Compression molding is a technique that's been used for years in various industries, from plastics to ceramics. In the world of leather crafting, it offers a unique way to alter the texture and stiffness of leather, giving it a distinct finish that's both functional and aesthetically pleasing. Let's embark on a journey to understand this method better and explore its nuances.
🧰 Tools & Resources:
-
Compression Molding Station or Hydraulic Press: This machinery is the heart of the process. It's designed to exert even pressure on materials, making them conform to a specific shape or texture.
-
Metal Plates or Molds: These are used to sandwich the leather during the compression process, ensuring it takes on the desired shape.
📖 Step-by-Step Guide:
- Setting the Stage: Imagine standing in a well-lit workshop, the scent of leather filling the air. Before you is the compression molding station, gleaming and ready for action. The first step is to ensure the station or hydraulic press is in optimal condition. Clean it thoroughly, removing any debris or residues that might affect the leather's finish.
- Tailoring the Leather: Every masterpiece begins with a blank canvas. In this case, that canvas is your leather piece. Using precision tools, cut the leather to the desired size and shape. This step is crucial as it determines the final product's dimensions and appearance.
- Positioning: With the leather tailored, it's time for positioning. Place the leather piece between the metal plates or molds. Ensure it's lying perfectly flat, with no wrinkles or folds. This even placement guarantees uniform pressure distribution, which is vital for a consistent finish.
- The Transformation: Now, the magic begins. Activate the machinery or hydraulic press, applying even pressure on the leather. As the pressure increases, the leather's fibers compress, altering its texture and stiffness. It's a transformative process, one that's mesmerizing to witness.
- Patience is Key: With the leather under pressure, patience becomes your best ally. Depending on the leather's thickness and the desired level of stiffness, you might need to hold it under pressure for anywhere between 10 to 30 minutes. This duration ensures the leather fully conforms to the mold and achieves the required rigidity.
- The Reveal: Once the time's up, release the pressure and carefully remove the leather from between the plates or molds. What you'll have is a beautifully molded piece of leather, stiffer and holding its new shape with pride.
💡 Expert Tips:
-
Even Placement is Crucial: Always double-check the leather's placement before starting the compression process. Any misalignment can lead to uneven finishes, which might mar the final product's appearance.
-
Time Matters: While it might be tempting to rush the process, remember that the longer the leather remains under pressure, the better the results. However, always adhere to recommended durations to prevent over-compression.
-
Safety Above All: Machinery, especially ones that exert pressure, can be hazardous if not handled correctly. Always ensure you're familiar with the equipment's operation and keep an eye out for any anomalies during the process.
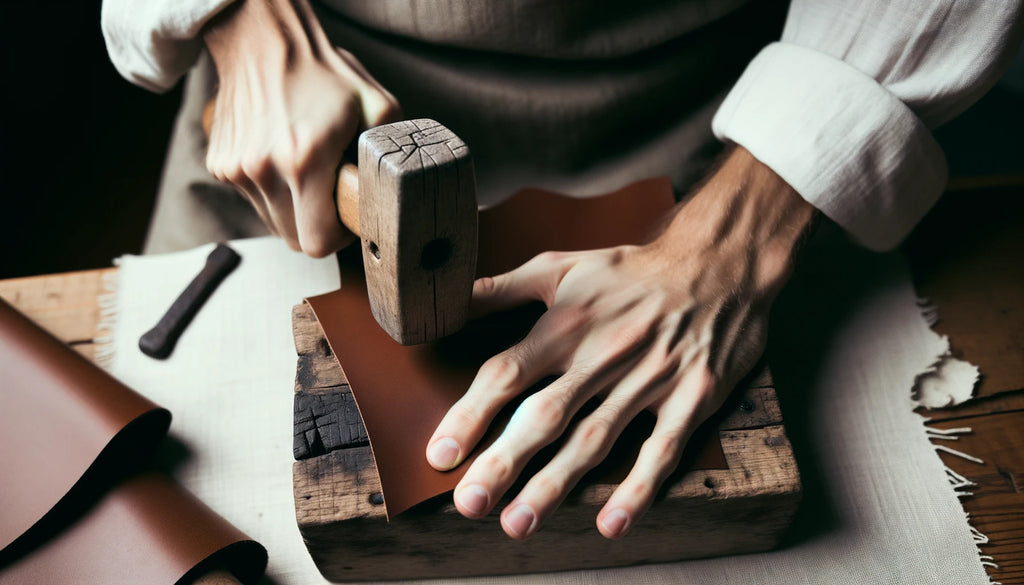
2. The Hammer Method: An Age-Old Technique
In the realm of leather crafting, some techniques have stood the test of time, proving their worth with each passing generation. The hammer method is one such technique. Simple yet effective, it's a method that relies on manual effort and a keen eye for detail. Let's delve deeper into this age-old technique and understand its intricacies.
🧰 Tools & Resources:
-
Hammer: A flat-faced hammer is ideal for this method. Its even surface ensures uniform compression, leading to a consistent finish.
-
Anvil or Hard Surface: A sturdy, flat surface is crucial. It provides the necessary resistance against the hammer's strikes, ensuring the leather is compressed effectively.
-
Water (Optional): A spray bottle filled with clean water can be used to dampen the leather, making it more malleable.
📖 Step-by-Step Guide:
- Preparation: Before diving into the hammering process, it's essential to prepare the leather. If you feel the leather is too rigid or if you're aiming for a specific shape, dampen it slightly using the spray bottle. This moisture makes the leather more receptive to shaping, ensuring the hammer's strikes are more effective.
- Laying the Groundwork: With the leather prepped, lay it flat on the anvil or hard surface. Smooth out any wrinkles or folds, ensuring the leather is perfectly flat. This even placement is crucial as it guarantees uniform compression during the hammering process.
- The Art of Hammering: Now, the real work begins. Holding the hammer firmly, start pounding the leather. Each strike should be even and consistent, compacting the leather's fibers. As you continue, you'll notice the leather becoming stiffer with each blow. It's a transformative process, one that requires patience and precision.
- Perseverance: Hammering leather is as much about skill as it is about perseverance. Continue hammering until you achieve the desired level of stiffness. It might seem like a workout, but the results are well worth the effort.
- Drying: If you chose to dampen the leather, it's essential to let it dry after hammering. Place the leather in a cool, shaded area, ensuring it dries evenly. Avoid direct sunlight as it can lead to discoloration.
💡 Expert Tips:
-
The Right Tool for the Job: While any hammer might seem suitable, a flat-faced hammer is ideal for this method. Its even surface ensures the leather is compressed uniformly, leading to a smooth finish.
-
Moderation is Key: If you're dampening the leather, remember not to overdo it. Excessive moisture can alter the leather's properties, leading to unexpected results.
-
Consistency Matters: When hammering, strive for consistency. Each strike should be of similar force, ensuring the leather stiffens evenly. This consistency is crucial for a professional finish.
Incorporating these techniques into your leather crafting can elevate your projects to new heights. Whether you're a seasoned professional or a budding enthusiast, understanding the nuances of leather stiffening can be a game-changer.
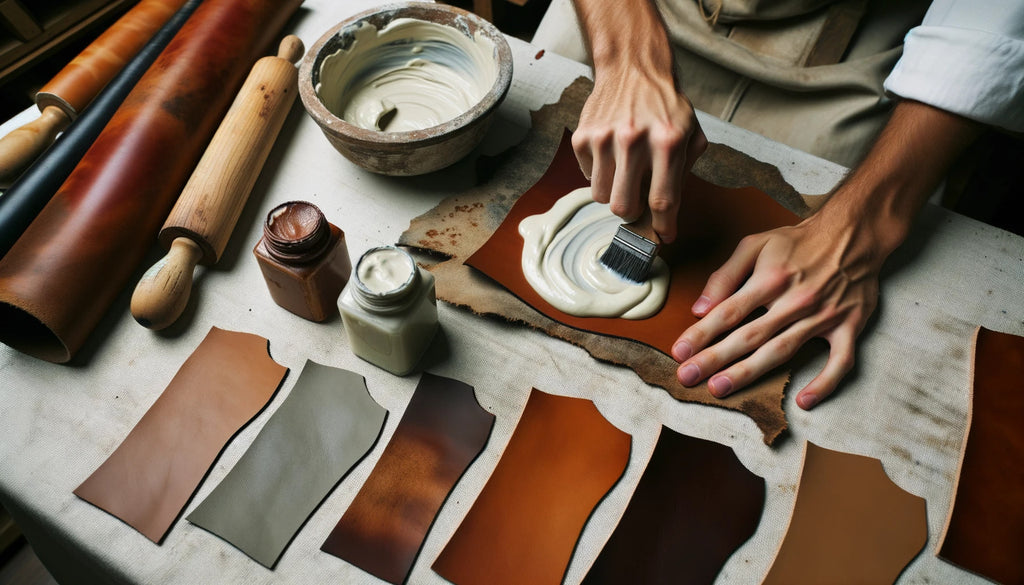
V. Resin Coating: A Modern Approach to Stiffening Leather
When I first ventured into the world of leathercraft, I was amazed by the myriad of techniques available to modify leather's properties. One method that particularly caught my attention was the use of resin coatings. It's a modern approach that offers both protection and stiffness to leather products. Let's delve deeper into this method.
🧰 Tools & Resources You'll Need
Before we start, ensure you have the following tools and resources on hand:
- Epoxy or polyurethane resin: These are the primary agents that will provide that protective and stiffening layer to your leather.
- A paintbrush: This will be used to apply the resin evenly.
- A clean cloth: Essential for prepping the leather.
📖 Step-by-Step Guide to Resin Coating
-
Preparation is Key: Begin by cleaning the leather surface with a cloth. It's crucial to remove any dirt, oils, or residues. A clean surface ensures better adhesion of the resin, making the process more effective.
-
Safety First: Now, I can't stress this enough - always work in a well-ventilated area when dealing with resins. These compounds can release fumes that aren't exactly a breath of fresh air. Opening windows or working outdoors can make a world of difference.
-
Mixing the Resin: Depending on the product you've chosen, you'll need to prepare the epoxy or polyurethane resin as per the manufacturer's instructions. Some resins come pre-mixed, while others might require you to play chemist for a bit. Don't worry; it's simpler than it sounds!
-
Application: With your paintbrush at the ready, apply a thin, even layer of the resin to the leather surface. Imagine you're painting a masterpiece; smooth, even strokes will give the best results.
-
Patience is a Virtue: Once applied, the resin needs time to cure. This duration can vary based on the product, so always refer to the manufacturer's guidelines. As it cures, the magic happens, and your leather starts to stiffen.
💡 Expert Tips to Ace the Resin Coating Process
- Cleanliness is Next to Godliness: Always ensure the leather is pristine before application. Any dirt or residue can interfere with the resin's adhesion.
- Follow the Manual: Manufacturers know their product best. Always adhere to their guidelines for optimal results.
- Variety is the Spice of Life: There are various resins available in the market. Some might offer a glossy finish, while others might be matte. Choose one that aligns with your desired aesthetic.
A Little Humor to Wrap Things Up: Why did the leatherworker always carry resin? Because he wanted to "stick" to tradition while embracing modernity!
The resin coating process is a fantastic method, especially for those who love blending traditional craft with modern techniques.

VI. How To Care For Stiffened Leather?
After investing time and effort into stiffening your leather, it's essential to know how to maintain its quality and longevity. Proper care ensures that the leather remains in top condition, serving its purpose while retaining its aesthetic appeal.
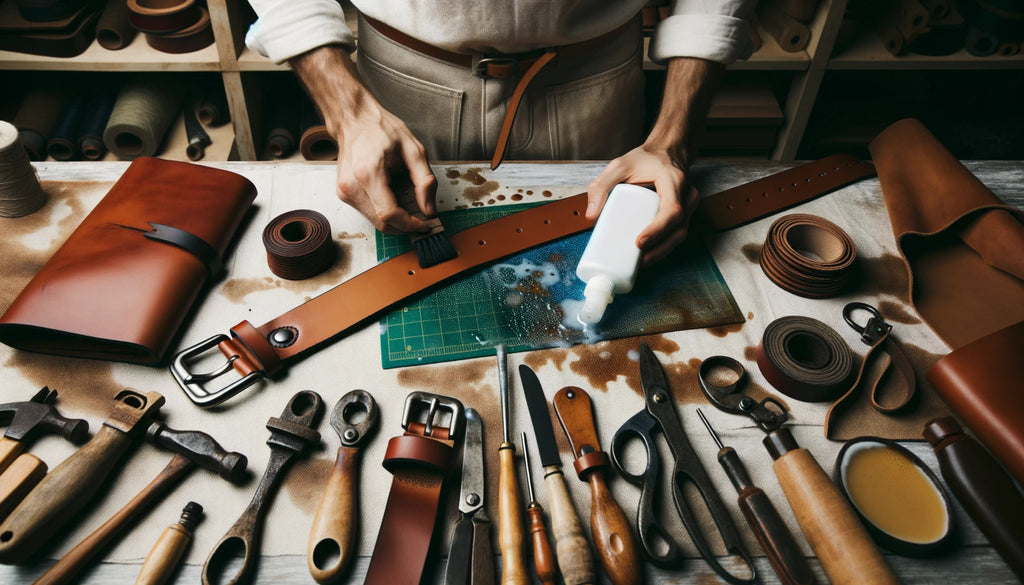
1. Cleaning and Maintenance
When I first ventured into the world of leatherwork, I quickly realized that maintenance is just as crucial as the crafting process itself. Here's a guide on how to care for your stiffened leather:
1. Regular Cleaning: Just like our skin, leather needs regular cleaning to remove dirt, dust, and occasional spills. Use a soft, damp cloth to wipe the surface gently. For deeper cleaning, consider using a leather cleaner suitable for your leather type. Remember, a clean leather surface not only looks good but also prolongs its life.
Expert Tip: Always test any cleaning product on a small, inconspicuous area first to ensure it doesn't discolor or damage the leather.
2. Conditioning: Over time, leather can lose its natural oils, leading to dryness and potential brittleness. To prevent this, it's advisable to condition your leather periodically. Leather conditioners replenish the essential oils, ensuring the leather remains supple and vibrant. When I condition my leather pieces, I often marvel at how they come back to life, looking refreshed and renewed.
Expert Tip: Less is more. A small amount of conditioner goes a long way. Over-conditioning can make the leather too soft, negating the stiffening process.
3. Handling and Storage: Stiffened leather, while durable, can be prone to wear and tear if not handled correctly. Avoid excessive bending, folding, or creasing. When storing, ensure the leather piece retains its shape, preferably in a cool, dry place away from direct sunlight.
Expert Tip: If you're storing leather items like bags or shoes, consider using fillers like bubble wrap or tissue paper to help them retain their shape.
Caring for stiffened leather might seem like a daunting task, but with the right knowledge and a bit of patience, it becomes second nature. Remember, the goal is to ensure your leather serves its purpose while looking its best. And who knows? With proper care, your leather piece might just outlive us all!
Conclusion
Stiffening leather is both an art and a science, a blend of traditional techniques and modern innovations. Whether you're looking to craft a durable piece of armor, a sturdy book cover, or simply want to give an old leather item a new lease of life, understanding the methods and care involved is crucial.
But remember, while the process might seem intricate, the results are truly rewarding. With the right knowledge and a touch of patience, you can transform any leather piece into a work of art that not only serves its purpose but also stands the test of time.
Frequently Asked Questions
Can I stiffen leather that's already been dyed or colored?
A: Yes, you can. However, some stiffening methods, especially those involving water or heat, might alter the color slightly. Always test on a small section first.
Q: Is there a way to reverse the stiffening process?
A: While some methods can be somewhat reversed by conditioning or softening the leather, it's challenging to revert leather to its original state entirely.
Q: How long does stiffened leather last?
A: With proper care and maintenance, stiffened leather can last for years, if not decades. Its longevity also depends on the type of leather and the stiffening method used.
Q: Can synthetic leather be stiffened?
A: Synthetic leather, or faux leather, doesn't respond to stiffening methods the same way natural leather does. It's best to consult the manufacturer's guidelines.
Q: Are there any eco-friendly alternatives to traditional stiffening methods?
A: Yes, vegetable-tanned leather and water-based stiffening methods are more environmentally friendly than some chemical-based processes.
Q: Can I use household items to stiffen leather?
A: While there are DIY methods involving household items, it's always best to use products designed for leather to ensure quality results.
Q: How do I know which stiffening method is best for my project?
A: It depends on the desired outcome. For a mildly stiffer texture, water-based methods work well. For a very hard finish, methods like resin coating or wax baking are more suitable.
Q: Can I combine multiple stiffening methods?
A: While it's possible, it's essential to understand how one method might affect the other. It's advisable to consult with leather experts or do thorough research before combining methods.
Q: Does weather or humidity affect stiffened leather?
A: Yes, high humidity can soften leather, while dry conditions can make it more brittle. It's essential to store leather items in a controlled environment.
Q: Are there any safety precautions I should take when stiffening leather?
A: Always work in well-ventilated areas, especially when using chemicals or resins. When using heat or ovens, monitor the leather closely to prevent overheating or burning.
📫 Related Blog Posts:
📌 How to Restore Leather? A Complete Guide to Revive Your Leather

4 comments
Bonjour,
Je souhaiterais savoir si je peux rigidifier des parties d’un sac à main, le rabat du sac et aussi la pochette avant.
Mon conjoint m’a offert un magnifique sac de marque à Noël, acheté sur internet, mais quand je l’ai ouvert, j’ai vu qu’il a sûrement été écrasé lors du conditionnement, soucieuse des détails, j’aimerais pouvoir redonner une forme rigide au rabat et retirer les marques de l’ance sur la pochette avant. Comment faire ?
Seems I found most of the information I needed here. Also very well written! Thank you. Buck
Very well explained also fun to read, can’t wait till i give a try to some of those methods.
Thank you for sharing your knowledge and experience.
Thank you for such a thorough leather stiffening guide. I’ve been self-teaching, and have experimented these methods on scrap leather. They’ve worked like a charm and I’m very excited to apply these techniques to my work.
Leave a comment