
Mastering Leather Repair: A Complete Guide for Longevity
Reading Time: about
Before you throw out that scratched bag, cracked belt, or torn jacket — most leather damage is fixable at home. The repair method just needs to match the type and severity of the damage.
Leather repair involves restoring damaged leather — scratches, scuffs, tears, cracks, and discoloration — using techniques from simple conditioning and color-matching creams to professional patching and re-dyeing. Most minor damage can be repaired at home for under $30.
We break down the five most common types of leather damage with specific fixes for each, from the 30-second finger rub to professional-level restoration.
What Causes Leather Damage?
When we talk about leather, it's important to remember that it's a natural material, rich in history and widely used in a variety of products. However, like all materials, leather is prone to damage over time. Understanding the types of damage leather can sustain and how to assess its severity is crucial in maintaining its longevity and aesthetic appeal.
1. Types of Leather Damage
a. Scratches
We often encounter scratches on leather items, ranging from superficial marks to deeper grooves. These imperfections can result from everyday use, accidental scrapes, or contact with sharp objects. Superficial scratches often affect only the surface, leaving the integrity of the leather intact. However, deeper scratches may cut into the hide, causing more significant damage.
To address these issues, it's important to consider the type of leather. Aniline leather, known for its natural appearance, is more susceptible to visible scratches due to its lack of protective coating. On the other hand, protected leathers like semi-aniline and pigmented leather are more resilient but still require care when dealing with scratches.
b. Tears and Punctures
Tears and punctures are more severe forms of damage. They can be caused by excessive stress or puncturing forces on the leather. Unlike scratches, tears and punctures penetrate through the leather, potentially compromising its structure. Repairing this type of damage often requires more intricate techniques like patching or stitching, and in some cases, the application of a leather filler.
The key to effectively dealing with tears and punctures is early intervention. Small tears can grow over time, especially on frequently used items like leather furniture or jackets, making them more challenging to repair later.
c. Worn-out Surfaces
Over time, leather can become worn, especially in high-contact areas like seat cushions or armrests. This wear can manifest as fading, discoloration, or thinning of the material. While regular conditioning can help prevent premature wear, once the leather is damaged, restoration may require re-dyeing or applying a leather finish.
Each of these damage types has its unique characteristics and repair methods. Understanding these helps in choosing the right approach for maintaining your leather items.

2. Assessing the Severity of Damage
a. Minor versus Major Damage
The line between minor and major leather damage can sometimes be blurry, but generally, minor damage refers to issues that don't compromise the structural integrity of the leather. This includes light scratches, small scuffs, and slight discoloration. These can often be treated with DIY methods like conditioning, polishing, or light filling.
Major damage, however, involves deeper scratches, large tears, or significant wear that affects the leather's strength and appearance. In such cases, professional repair might be necessary, especially when dealing with valuable or antique leather pieces.
b. When to Seek Professional Help
We should consider professional repair services for complex or extensive damage. Professionals have the tools, skills, and experience to handle challenging repairs, such as large tears, deep scratches, and severe discoloration. Additionally, if the leather item holds sentimental or high monetary value, it's advisable to consult a specialist to ensure the repair is done correctly and preserves the item's integrity.

What Tools Do You Need for Leather Repair?
1. Choosing the Right Repair Kit
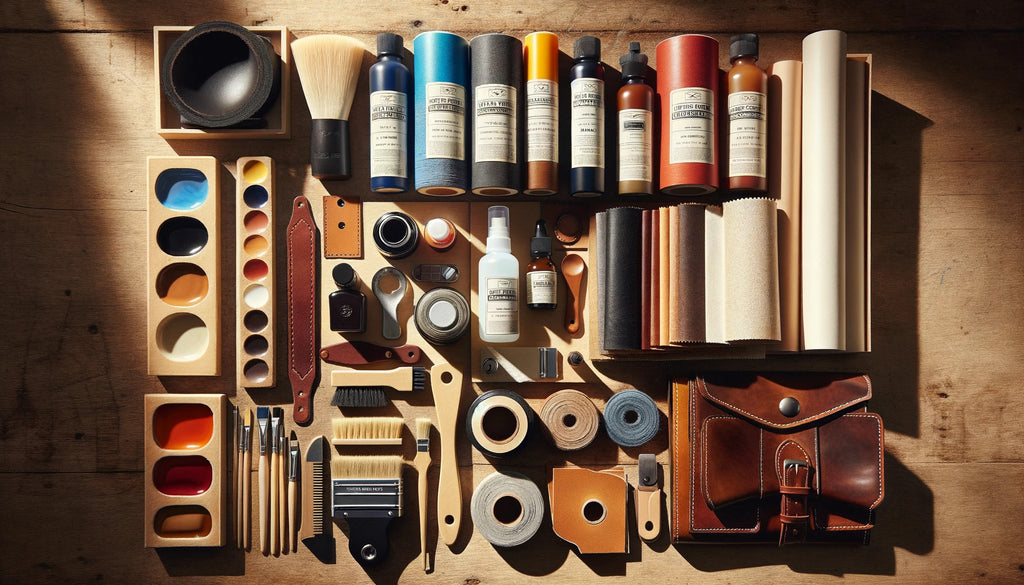
Leather restoration requires a well-chosen repair kit, which is a collection of items designed to mend various types of damage in leather goods. A typical leather repair kit includes colorants and dyes for matching the original leather color, leather adhesive for a strong and flexible bond, backing fabrics for hole and tear support, grain papers to replicate texture, and applicators like sponges and brushes for applying dyes and adhesives.
a. Components of a Typical Leather Repair Kit
A standard leather repair kit usually encompasses a variety of items. It often includes:
- Colorants and Dyes: These are crucial for matching the repair area with the original color of the leather.
- Leather Adhesive: A specialized glue that creates a strong, flexible bond suitable for leather.
- Backing Fabrics: Used as a support for repairing holes and tears.
- Grain Papers: To help replicate the texture of the leather.
- Applicators: These can range from sponges to brushes, used for applying dyes and adhesives.
Beyond the basics, quality repair kits may also contain items like threads, fillers, needles, and extra leather material, catering to a range of repairs from upholstery to personal accessories. The color match is critical to ensure the repair is not obvious, and the type of repair dictates the kit one should purchase. For instance, larger missing sections need kits with color matching patches and adhesives, while small scratches might be fixed with colorized chemicals.
b. Recommendations for Quality Repair Kits
In recommending repair kits, prioritize options with a wide range of colorants and strong, durable adhesives. Look for kits suitable for various leather types and damages, including furniture, automotive, clothing, and more. Versatile kits, like the Fortivo Leather and Vinyl Repair Kit, provide comprehensive color guides, intermixable colors, and are suitable for various damages such as cuts, burns, scratches, tears, and cracks
2. Additional Tools and Materials
Apart from the standard contents of a repair kit, there are additional tools and materials that can significantly enhance the quality of your leather repair.
a. Leather Glue
Leather glue is an indispensable component in any repair toolkit. Opt for a glue that is waterproof, dries clear, and offers flexibility post-drying. This ensures that the repaired area remains resilient and seamlessly integrates with the rest of the item.
b. Sub-Patch for Larger Repairs
For larger tears or holes, a sub-patch provides the necessary support to the damaged area. It's typically placed behind the leather, acting as a foundation for adhesives and fillers. Ensure that the sub-patch material is sturdy yet thin enough not to create a noticeable bulge.
c. Cleaning and Conditioning Materials
Finally, don't overlook the importance of pre- and post-repair care. Cleaning the leather with a gentle, appropriate cleaner before repair ensures better adhesion of materials. Post-repair, conditioning the leather is vital to restore its suppleness and prevent future damage.
In conclusion, the right tools and materials are paramount in executing a successful leather repair. Whether it’s a minor scratch or a significant tear, having a comprehensive repair kit, coupled with some additional materials like quality leather glue and sub-patches, can make all the difference. Remember, the aim is not just to repair but to restore the leather to its former glory, ensuring it continues to age gracefully.

How Do You Prepare Leather for Repair?
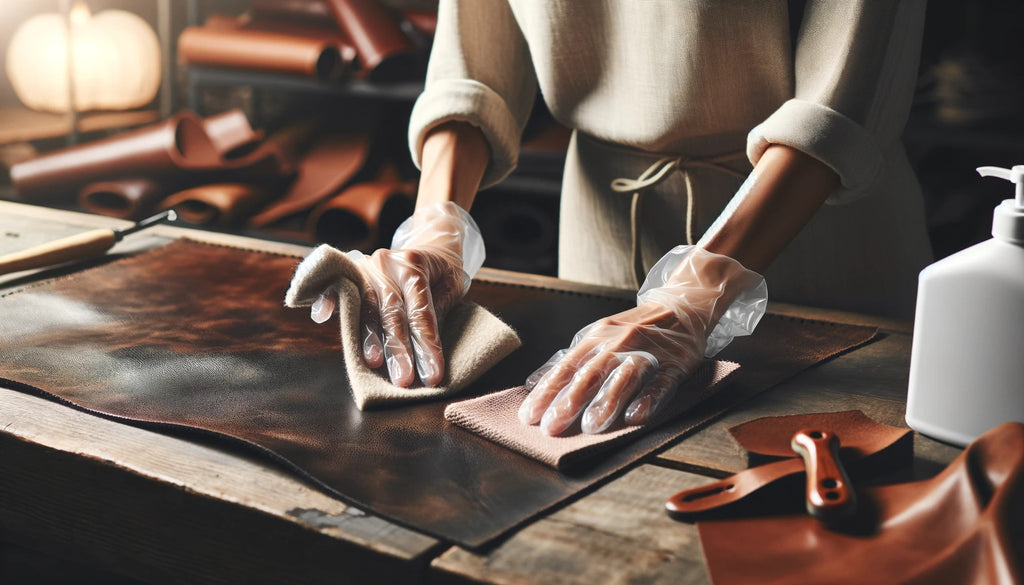
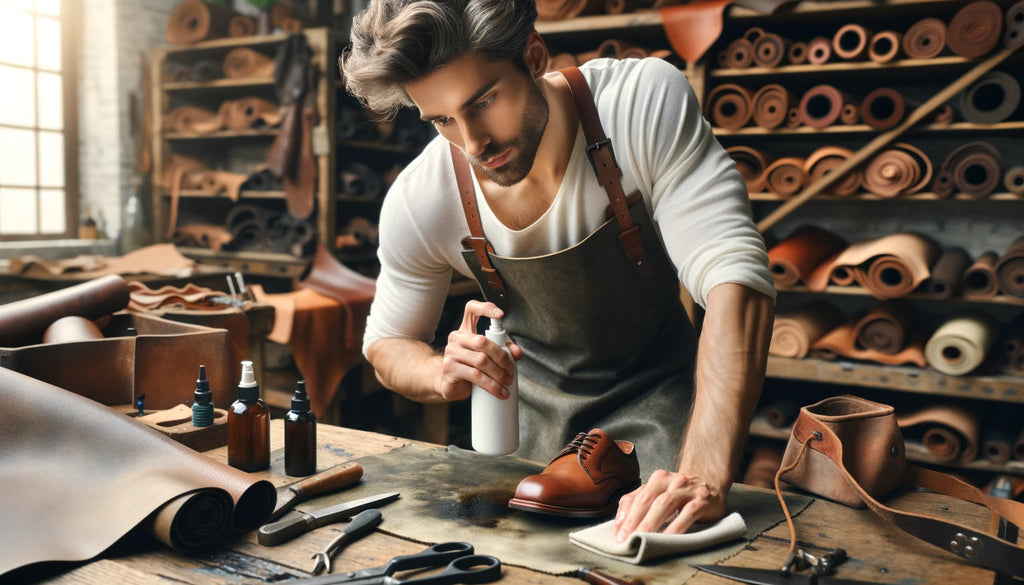
a. Cleaning the Leather
Before diving into the nitty-gritty of leather repair, it's crucial to understand the importance of cleaning leather properly. This step is not just about aesthetics; it's about preparing the leather to receive the repair treatments effectively. Let me guide you through a step-by-step process to ensure your leather is prepped and primed for repair.
-
Choose the Right Cleaning Agent: For most types of leather, a gentle, water-based cleaner is ideal. Avoid harsh chemicals that can damage leather fibers. If you're unsure, test the cleaner on a small, inconspicuous area first.
-
Wipe Down Gently: Using a soft cloth, lightly dampened with the cleaner, gently wipe the surface of the leather. This removes surface dirt and oils that can interfere with the repair process.
-
Deep Cleaning for Stubborn Areas: For tougher stains or areas with accumulated grime, use a soft-bristled brush. Gently scrub the area in a circular motion. This deep cleaning process helps expose the actual extent of the damage.
-
Rinse and Dry: Once the leather is clean, wipe it down with a damp cloth to remove any cleaner residue. Then, let it air dry naturally. Avoid using heat sources like hair dryers, as they can cause additional damage.
-
Conditioning After Cleaning: After cleaning, and especially if the leather feels dry, apply a leather conditioner. This step is crucial for maintaining the leather's flexibility, which is important for the upcoming repair process.
Cleaning leather is a delicate balance. The goal is to remove dirt and grime without stripping away natural oils or causing additional wear. Remember, the cleaner the leather, the more effectively repair materials will adhere to it.
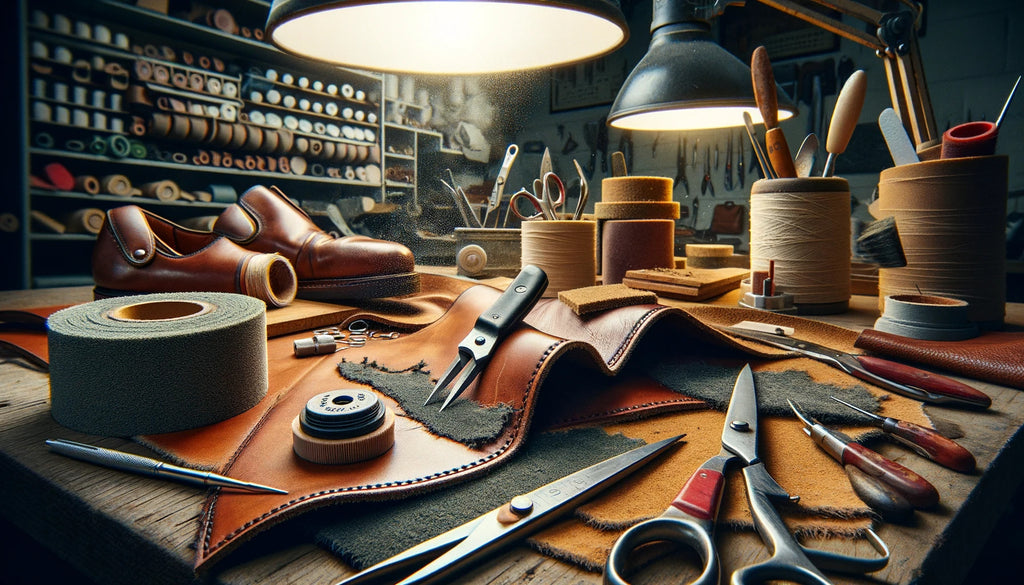
b. Trimming and Prepping the Damaged Area
Once your leather item is clean, the next step is to prepare the damaged area for repair. This is where precision and a steady hand come into play.
-
Assess the Damage: Take a good look at the damaged area. Understand the extent of the damage - is it a surface scratch, a deeper crack, or a tear? Each type requires a slightly different approach.
-
Trimming Frayed Edges: For tears or areas with loose fibers, use a pair of fine scissors or a sharp knife to trim away frayed edges carefully. This step is vital for creating a smooth surface that will blend seamlessly with the repair materials.
-
Sanding for Smoother Repairs: If dealing with a scratch or a crack, lightly sand the area with fine-grit sandpaper. This creates a more receptive surface for fillers or adhesives.
-
Cleaning Post-Trimming: After trimming, give the area another quick clean to remove any leather particles or dust from sanding.
-
Applying a Sub-patch for Tears: If you're repairing a tear, you may need to insert a sub-patch material under the leather. This acts as a base for the filler and helps in maintaining the leather's integrity.
-
Preparing for Filler Application: For cracks or deep scratches, ensure the area is flat and ready to receive the filler. If using a patch, ensure it's cut to the right size and shape.
Proper preparation is key to a successful leather repair. It ensures that the repair materials adhere properly and that the finished product looks as seamless and natural as possible. Each step, from trimming to prepping, sets the foundation for a durable and visually pleasing repair.
What Are the Best Repair Techniques for Each Type of Leather Damage?
1. Fixing Scratches and Minor Tears
When it comes to maintaining the elegance of leather items, addressing scratches and minor tears promptly is essential. As an experienced craftsman, I've learned that early intervention can significantly reduce the visibility of such damages, preserving the leather's aesthetics and integrity.
a. Cleaning and Conditioning to Minimize Visibility
The initial step in repairing minor leather damage involves thorough cleaning.
- Use a soft cloth and a gentle leather cleaner to remove any dirt or grime from the damaged area. This step is crucial as it prepares the surface for further repair work.
- Once cleaned, it's time to condition the leather. Leather conditioners are vital in restoring moisture lost due to scratches or tears, helping to blend the damage into the surrounding material. Apply the conditioner evenly and allow it to penetrate deeply into the leather fibers. This process not only minimizes the visibility of the damage but also rejuvenates the leather, enhancing its durability and appearance.
b. Applying Leather Fillers for Deeper Scratches
For deeper scratches, leather fillers are a game-changer. These fillers are designed to seamlessly blend with the leather's texture, providing a smooth and uniform finish.
- Start by applying a small amount of filler into the scratch using a palette knife or a similar tool. It's important to fill the scratch completely and level it with the surface.
- Once the filler dries, which usually takes a few hours, gently sand the area with fine-grit sandpaper. This will ensure the filled area is flush with the surrounding leather.
- Finally, apply a colorant that matches your leather's hue, followed by a topcoat for protection. This method effectively conceals deeper scratches, restoring the leather's pristine look.
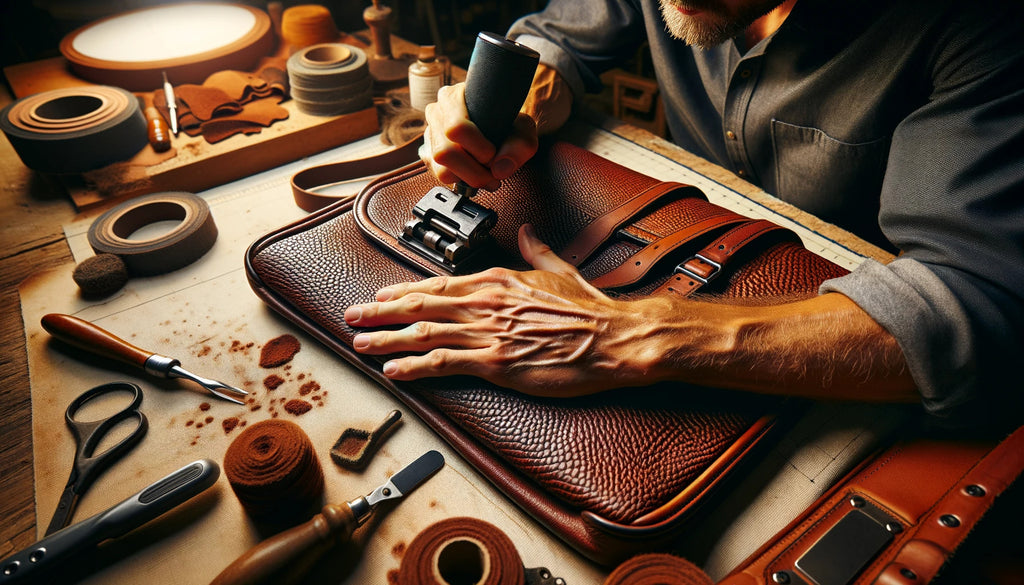
2. Repairing Tears and Holes
Tears and holes in leather, whether in furniture, jackets, or accessories, can be distressing. However, with the right techniques, these damages can be repaired to look almost as good as new.
a. Inserting a Sub-Patch for Support
Repairing larger tears and holes often requires a sub-patch for added support. This involves cutting a piece of leather or fabric slightly larger than the hole and inserting it beneath the damaged area. The patch acts as a foundation, providing stability and strength to the repair. It's essential to use a flexible adhesive to attach the patch to the underside of the leather, ensuring it spreads evenly without leaving any gaps.
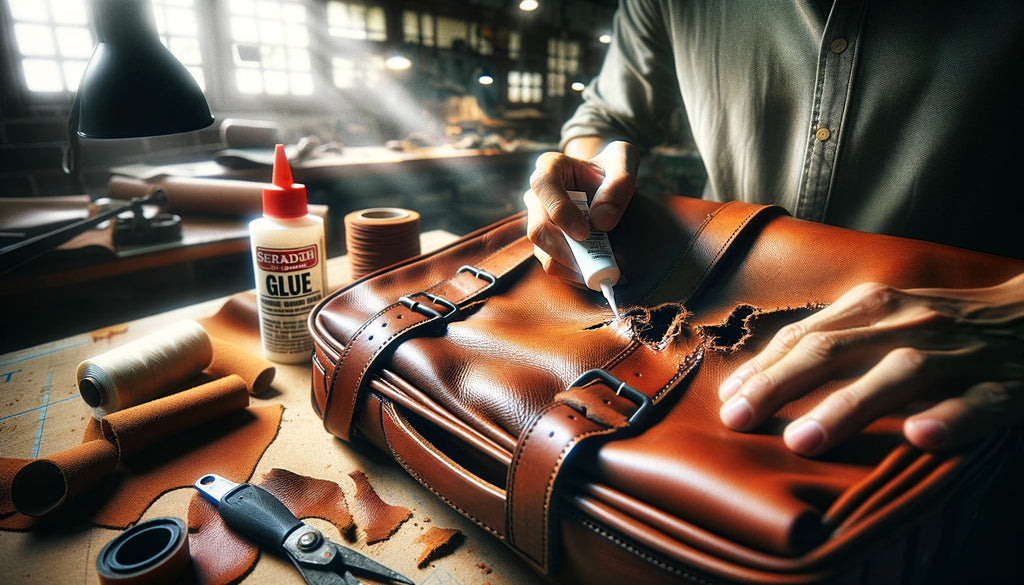
b. Gluing and Sealing the Tear
Once the sub-patch is in place, the next step is to glue the edges of the tear. Use a leather-specific adhesive for this purpose. Apply a thin layer along the edges of the tear and press them together gently. Ensure the alignment is precise to avoid any unevenness. Let the adhesive set as per the manufacturer's instructions.
c. Texturing the Repair Area to Match Surrounding Leather
The final step involves texturing the repair area. This is crucial for a seamless finish, especially for leathers with a distinct grain pattern. Leather grain papers, available in various textures, are used in this process. Place the grain paper over the repaired area and apply heat using a special tool or a household iron. The heat causes the leather adhesive to emboss the texture from the paper onto the repair, creating a match with the surrounding area. This technique takes practice but results in an almost invisible repair, retaining the leather’s natural look.
3. Restoring Worn-Out Leather
Leather, over time, can show signs of wear and tear, especially in frequently used items like sofas or jackets. These worn-out areas, however, can be revitalized with proper care and techniques.
a. Using Filler for Larger Worn-Out Areas
For extensive worn-out areas, using a leather filler is an effective solution. Begin by cleaning the area thoroughly and then apply the filler in layers. Each layer should be allowed to dry before applying the next. This process fills in any depressions or unevenness in the leather. Once the final layer is dry, it should be sanded down to ensure it is level with the rest of the leather surface.
b. Texturing Techniques for a Natural Look
After the filler application, the next step is to reintroduce texture to the repaired area. This is achieved through a combination of colorant application and texturing tools. Matching the colorant to the original leather color is vital for a natural look. Apply the colorant in thin layers, allowing each to dry before adding the next. Once the desired color is achieved, use texturing tools to imprint a pattern that matches the original leather texture. This step requires a careful eye and a steady hand but is essential for a cohesive and natural finish.
In conclusion, repairing leather, whether it involves minor scratches, tears, or extensive wear, demands attention to detail and patience. Using the right tools and techniques, you can restore your leather items to their former glory, extending their lifespan and maintaining their beauty.
How Do You Finish a Leather Repair Job?
1. Applying Leather Conditioner
a. Benefits of Conditioning After Repair
When we think about restoring leather to its former glory, conditioning plays a pivotal role. It's akin to providing a revitalizing drink for parched skin. Post-repair conditioning of leather is essential for several reasons:
-
Maintaining Pliability: Leather, much like our own skin, needs moisture to remain flexible and resilient. Conditioning ensures the leather doesn't become stiff or prone to cracking, especially after undergoing repair processes.
-
Protective Barrier: A good conditioner doesn't just moisturize; it also forms a defensive layer. This barrier shields the leather from stains, scratches, and further damage, a crucial step after repairing any wear or tear.
-
Aesthetic Enhancement: Conditioning leather post-repair brings out its inherent beauty. It helps in making the leather look fresh, vibrant, and smooth, reinstating its original luster that might have been dulled by damage.
-
UV Protection: Much like sunblock for our skin, certain leather conditioners contain anti-UV properties. These are vital in preventing the leather from hardening or becoming rigid due to sun exposure, thus maintaining its quality over time.
b. Techniques for Even Application
Achieving an even application of leather conditioner is crucial for a consistent look and feel. Here are some steps to ensure an optimal outcome:
-
Preparation: Start by gently cleaning the leather with a soft cloth in circular motions. This preps the surface for even absorption of the conditioner.
-
Application Method: Use a lint-free cloth to apply the conditioner. Dispense a bit of conditioner onto the cloth, not directly onto the leather, to avoid uneven saturation at the application site. Gently apply in a thin, even coat over the entire surface.
-
Regular Conditioning: Leather, especially post-repair, benefits from regular conditioning. This practice keeps it consistently moisturized and protected, extending its lifespan and maintaining its appearance.
2. Color Matching and Dyeing
a. Tips for Matching the Color of the Leather
Matching the color of leather during repairs is a crucial step to ensure the repair blends seamlessly with the original material. Here's how to achieve an accurate color match:
-
Understand Manufacturer Variations: Be aware that each manufacturer may have unique color codes and names. This variation can make finding an exact match challenging. It's essential to know these codes, especially when dealing with furniture or automotive leather.
-
Blending Techniques: Sometimes, achieving a perfect color match may be impossible due to dye lot variations or fading from light exposure. In such cases, blending the color out to a break in the leather can help in making the repair less noticeable.
-
Selecting the Right Gloss Level: The gloss level of the dye can significantly affect the final appearance. Choose from low gloss (flat finish), semi-gloss (slight subtle sheen), or high gloss (high sheen) based on the original leather’s sheen and the area of application, such as furniture or automotive interiors.
b. Applying Dye for Consistent Appearance
Applying dye to leather requires precision and attention to detail. Here are some steps to ensure a consistent appearance:
-
Preparation: Clean the leather thoroughly before dye application. This removes any residues that might affect the dye's adherence.
-
Test First: Always test the dye on a small, inconspicuous area first. This helps in assessing the color match and understanding how the leather absorbs the dye.
-
Gradual Application: Apply the dye in thin, even layers. Gradual application allows for better control over the color intensity and helps in achieving a uniform appearance.
-
Drying and Reassessment: Allow the dye to dry completely before assessing the color match. If necessary, apply additional coats until the desired color is achieved, ensuring each layer is dry before applying the next.
-
Sealing the Dye: Once the desired color is achieved, seal the dye with an appropriate finisher. This step is crucial to protect the color and enhance the durability of the repair.
The post-repair phase of leather restoration, involving conditioning and color matching, is as crucial as the repair itself. By following these detailed steps and techniques, we can ensure that the leather not only looks rejuvenated but also retains its quality and durability for years to come.

How Can You Prevent Future Leather Damage?
1. Regular Maintenance Tips
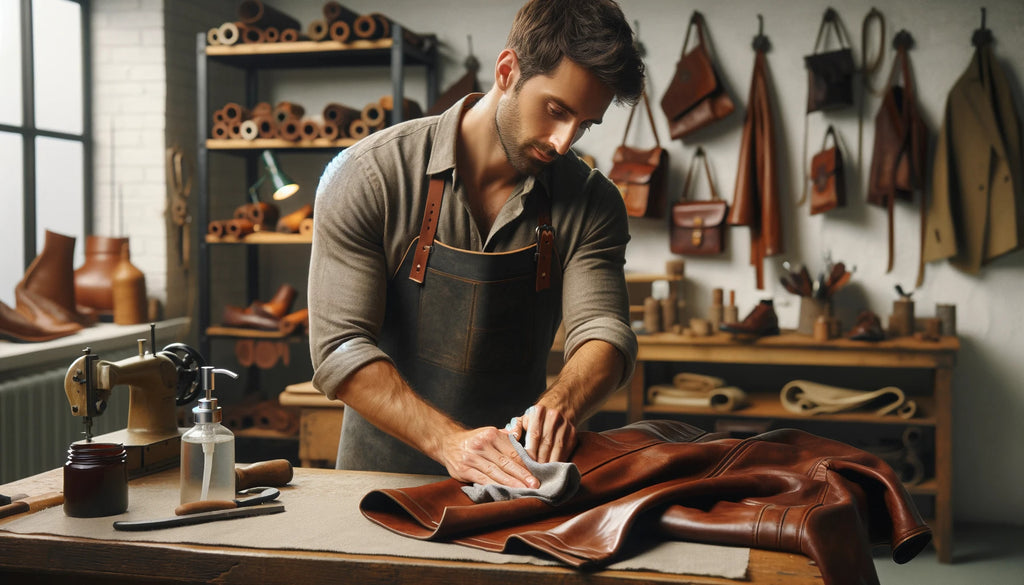
a. Cleaning and Conditioning Routine
I can't stress enough how vital a regular cleaning and conditioning routine is for maintaining the health and appearance of your leather items. Leather, being a natural material, requires consistent care to retain its flexibility, color, and texture.
b. Step-by-Step Cleaning Process:
- Initial Wiping: Start by gently wiping your leather with a soft, dry cloth to remove surface dust and dirt. This simple action, done regularly, can significantly extend the life of your leather goods.
- Deep Cleaning: Once every few months, use a specialized leather cleaner. Apply it in a circular motion using a soft cloth. This cleaner helps to remove built-up grime and rejuvenate the leather's surface.
- Spot Cleaning: For any spills or stains, address them promptly with a damp cloth. Avoid harsh chemicals or abrasive materials, as these can damage the leather's finish.
c. Conditioning Leather:
- Frequency: Conditioning should follow cleaning, typically every 3-6 months. This frequency may vary depending on the climate and how often the item is used.
- Applying Conditioner: Use a quality leather conditioner. Apply it sparingly and evenly, allowing the leather to absorb it fully. This step is crucial for preventing drying and cracking.
d. Protecting Leather from Environmental Factors
Leather's worst enemies include sunlight, heat, and moisture. To safeguard your leather items, consider the following:
- Sunlight and Heat: Keep leather furniture and accessories away from direct sunlight and heat sources. Prolonged exposure can cause fading and drying.
- Humidity Control: Maintain a stable, moderate humidity level in your home. Too much moisture can lead to mold growth, while too little can cause drying and cracking.
- Using Protective Sprays: For items that are frequently exposed to the elements, like leather jackets or shoes, use a leather-specific protective spray. This can offer a barrier against water and stains.
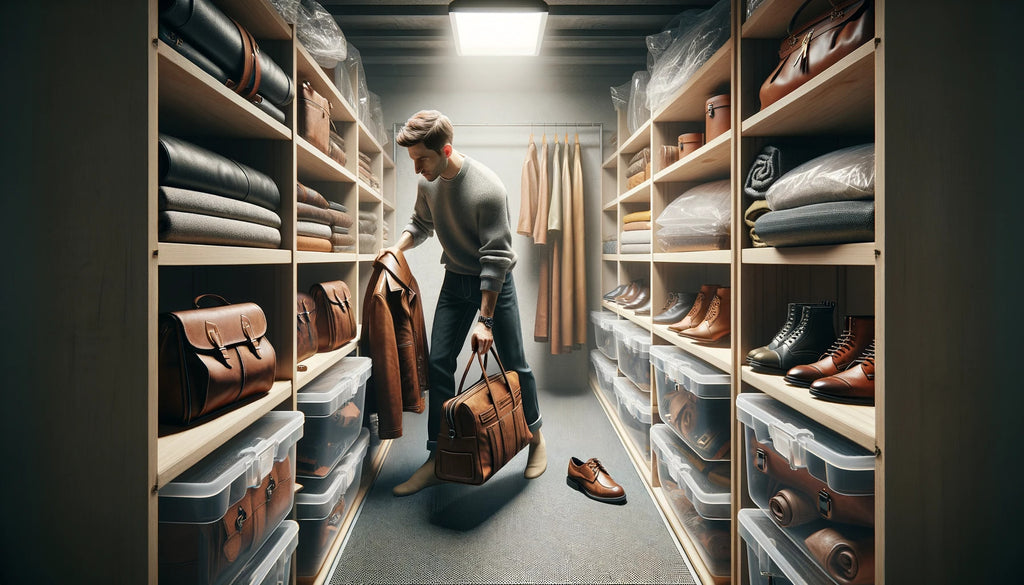
2. Avoiding Common Leather Damages
a. Best Practices for Leather Care
In our journey with leather goods, we must be mindful of certain practices to avoid common leather damages. Let's explore some best practices:
- Proper Storage: When not in use, store leather items in a cool, dry place. Avoid plastic bags or non-breathable covers, as these can cause moisture buildup.
- Avoid Overloading: Leather bags and wallets can stretch and deform if overfilled. Be mindful of how much you're packing into them.
- Immediate Attention to Spills: Spills should be wiped off immediately with a soft cloth. Avoid rubbing too hard, as this can push the spill deeper into the leather.
- Regular Inspection: Periodically inspect your leather items for signs of wear or damage. Early detection can make repairs simpler and less costly.
- Professional Help for Major Issues: For significant tears, deep scratches, or severe discoloration, seek professional assistance. Attempting DIY repairs on serious damage can sometimes exacerbate the problem.
By following these guidelines, we can significantly reduce the risk of damage to our beloved leather items. Remember, leather is not just a material; it's an investment in quality and style. With proper care and attention, your leather goods can last a lifetime, becoming more beautiful with age.
Incorporating these practices into our routine can ensure that our leather items remain in pristine condition, reflecting a sense of timeless elegance and durability. Remember, the key to longevity in leather lies in the care we provide.
Conclusion
In wrapping up, it's crucial to reiterate the importance of proper care and maintenance for leather goods. Leather, a durable yet sensitive material, demands attention and expertise to maintain its elegance and longevity. Through this guide, we've delved into the essentials of leather repair, offering insights and practical advice to both preserve and restore your cherished leather items.
The journey through understanding the types of leather, the tools needed for repair, and best practices for maintenance is more than just about upkeep; it's about fostering an appreciation for the craftsmanship and quality that goes into each leather product. Whether it's a beloved leather jacket, a cherished sofa, or a treasured handbag, the effort you put into maintaining these items reflects not only on their appearance but also on their lifespan.
Remember, the key to successful leather care and repair lies in regular maintenance, prompt attention to damage, and understanding when to seek professional help. With this knowledge, you can ensure that your leather goods remain a symbol of sophistication and durability for years to come.
FAQs
1. Can all types of leather be repaired at home?
Most common leather damages like scratches, minor tears, and fading can be repaired at home using appropriate repair kits and methods. However, extensive damage, such as deep cuts or severe deterioration, may require professional intervention.
2. How do I match the color of my leather during repairs?
When using leather repair kits, select a color compound that closely matches your leather. For a perfect match, custom-mix the colors provided in the kit or seek a color-matching service from a leather repair professional.
3. What is the best leather repair kit for beginners?
Choose a kit that is user-friendly and comes with a comprehensive instruction manual. Kits that include a variety of colors and easy-to-use tools, such as the Fortivo Leather and Vinyl Repair Kit, are ideal for beginners.
4. How often should leather furniture be conditioned?
Condition leather furniture every 6 to 12 months, depending on the climate and usage. Regular conditioning helps maintain moisture, preventing cracking and dryness.
5. Can large tears in leather be repaired without professional help?
Large tears can be challenging and might not yield seamless results with DIY methods. It's advisable to consult a professional for large or complex tears to ensure quality repair.
6. What are the risks of using DIY methods for leather repair?
DIY methods can sometimes exacerbate the damage, especially if incorrect techniques or materials are used. It's important to follow instructions carefully and test products on small areas first.
7. How can I prevent leather from cracking and tearing?
Regular cleaning, conditioning, and avoiding excessive exposure to sunlight and moisture can prevent leather from cracking and tearing. Also, avoid overloading leather items to prevent stretching and tearing.
8. Are heat-based repair kits better than glue-based ones?
Heat-based kits are generally more effective for smooth and seamless repairs, especially for minor scratches and tears. However, glue-based kits can be more suitable for specific types of damage or leather.
9. Can I repair leather goods that have faded due to sunlight exposure?
Yes, faded leather can often be restored using leather dyes or re-coloring balms. However, extreme fading might require professional dyeing services for a uniform look.
10. What are the best practices for maintaining leather items after repair?
After repairing leather, continue with regular cleaning and conditioning. Store leather items properly, away from direct sunlight and humidity, and handle them with care to prevent future damage.
📫 Related Blog Posts:
📌 How to Rehydrate Leather? Leather Rehydration Made Easy
📌 How to Clean White Leather? The Ultimate Guide to Pristine Elegance
📌 How to Paint Leather? Master the Art of Leather Painting
📌 How to Darken Leather? From Faded to Fabulous
📌 What is Eco Leather? The Future of Sustainable Fashion
📌 How to Restore Leather? A Complete Guide to Revive Your Leather

Leave a comment